SNOW!

As I write this Sunday evening, snow is drifting down…and sticking on my lawn and on my garden plants.  I have no fear that the chard will survive – it’s truly the wonder green.  I had a chard plant I kept going for two and a half years! I finally took it out, because I wanted to plant something else there.  Chard will freeze, wilt and spring back with watering.

But the mustard?  How will it fare?  I have both green and red mustard.  I’m sure the kale will make it.  Might just water it again tomorrow – deep watering – to give it some warmth.  And the lettuce under the window A-frame is missing out on the snow. 

That can be good and bad.  Snow can insulate a plant from deeper freezes.  But the ad hoc greenhouse may be just enough to keep the plants alive.  This is an experiment!

I tell anyone learning to garden – don’t be afraid to experiment!  That’s what it’s all about!  Try something new. Try a new plant. Try it in a new place or plant it in a new way.  You’ll have some failures. But you’ll also have some surprising successes – like my chard plant.

I’ll write more tomorrow – and may even take a picture or two to show how my garden did/did not survive the early snow.

Protecting Plants in the Freeze

The day before the expected first freeze of the season, I watered all the plants in my container garden deeply, to keep them warm through the possible freezing night.  I was most concerned about my lettuce, which makes wonderful salads.  After brainstorming with a friend, I retrieved two panes left from an old storm door that had been sitting the back yard since forever.  With a little duct tape, I managed an a-frame greenhouse arrangement over the bed. When I checked the lettuce this morning, it was still perky and actually felt a bit warmer to the touch than the other, uncovered greens.  Of course, I expect the mustard, kale and chard to weather the freezing temperatures well.  I have had chard covered in ice which I watered and it came back.  In fact, I have had a chard plant last 2.5 years before I became tired of it in the spot and took it out!  I’ve heard of one lady who had a plant that was 5 years old.  So the lesson is, plant chard where you want it to thrive for a while and keep it watered.

Beautiful Weather for Gardening

Greens-2Bin-2Btub-2B110714
This week I worked on my own container garden, thinning the kale, mustard and chard to make room for a few plants to truly take off.  I added azomite as well as worm castings before planting. 
Azomite provides multiple trace minerals (they say as many as 70!) that have been leached from our soils over the years.  That’s one reason our food is less nutritious than it was 50 years ago. 
And it’s another reason to garden organically.  What goes into the soil, goes into the plants, and goes into our bodies.  Our bodies also need these trace minerals.  Okay, I’ll step off my soapbox now.
I did have a wonderful greens supper the night of the thinning, cooking my mustard and kale greens with olive oil and garlic.
 
Entrance-2Bpot-2B110614
Another fun activity this week was planting a client’s ornamental pots, strewn about his pool area as well as his front entrance.  It’s a modern house with a magnificent view. 
He wanted color for the winter.  I chose cyclamens (rose, pink, red) as well as crotons (interesting veins of red, deep green, light green and gold), moneywort for ground cover and dripping from pots, cardoon (beautifully spiky for a variety of texture; this plant will grow larger), alyssum (for fragrance and some low level white contrast) and sedum (this variety has a purplish green leaf and is a ground cover that is also dripping over the edge of the pot). 
I even threw in a couple of chard plants!  Those will also grow larger, although they are hidden now.  I just can’t resist putting in an edible or two – maybe I should have also added some purple cabbage?  Well, too late now.  Since I’ve been focused on edibles, this was a fun variation.
Pool-2Bleft-2Bpot-2B110614AND THEN, I gave a talk on straw bale gardening to a local gardening group.  The advantage of straw bales is that they are mobile. They are also temporary and are ideal for renters who want to garden but don’t want to tear up a landlord’s yard.  Another use is if the only spot for a sunny garden is on the patio or the driveway! 
I found Joel Karsten’s book  (see my page on My Favorite Reference Books) on straw bale gardening particularly interesting, but decided to use an organic program to condition the bales rather than the one he uses. 
I’m on my second set of straw bales. The first ones worked really well, and by the end of the summer the tomatoes had completely covered the bales – you had to really look closely and pull tomato vines aside to see the bales.  But they required little watering and the interior was nice and composted. 
Straw-2Bbale-2Bplants-2B101014The second set I’m working on is a bit slower going because of the cooler temperatures.  I’ve used a different set of organic materials. It takes time – the plants are slow at first, but when they hit the composted interior….WOW! … they take off.  Here’s a picture of what my current set looked like on October 10.  Note the mushrooms that have appeared like stars among the transplanted greens. That means that the bales are “cooking” with microbes.

Moving Hens – and Mav the Alarmist

Chicken-2BMavAbout three weeks ago, I moved six hens into the backyard coop.  You’ve met the hens before…in previous posts… but in a different setting.  Now, they reside with me and I can sit on my back step with my tea and commune with them in the morning.  A dear friend helped me with the move, which required some planning.  First, we had to pick a night we were both available and then find two pet carriers.  A flashlight and headlamp completed the equipment list.

Hens should be moved at night – they are sleepy and so it is less traumatic for them.  We avoided lights, wondering if at any moment we might be questioned by law enforcement about why we were slinking about with flashlights hen-napping.  But, with a few squawks we managed to get all six hens transferred from their roost in the old coop and into the two carriers and loaded in my van.  A short drive to my house and the carriers were moved into position. I had planned on putting the carriers in the run and then opening the doors to let the hens wander out.  But, alas and alack … the door to the run was too narrow!

Therefore, after positioning each carrier at the door, I reached in and plucked each hen out, then placed her on the shelf above the watering/feeding station.  The shelf was the spot of choice because the coop framed out in the shed was not quite complete.  But, with a tarp over the end of the run, it was snug and cozy and the hens slept there for a few nights quite happily.

In the morning, I went out the back door, to find the hens clucking, scratching and pecking in their normal manner.  At least five of them….the sixth, Mavriki the black Australorp, was squawking and pacing about the run, checking the perimeter and otherwise fussing.  She seemed to be saying, “Doesn’t anyone else notice that this place is different?  Doesn’t anyone know we’re not where we were?!”  No one else seemed to care.  By the next morning they had convinced her it was okay, even if it was different.

The hens are now settled in and, with molting nearly complete two of the hens are laying again.  But wait eagerly for the green, blue and pink eggs to be gifted again by Winnie, Aurie and Rosie, the three Ameraucanas.


THE CHICKEN INTEGRATION SAGA OF JANUARY 2014


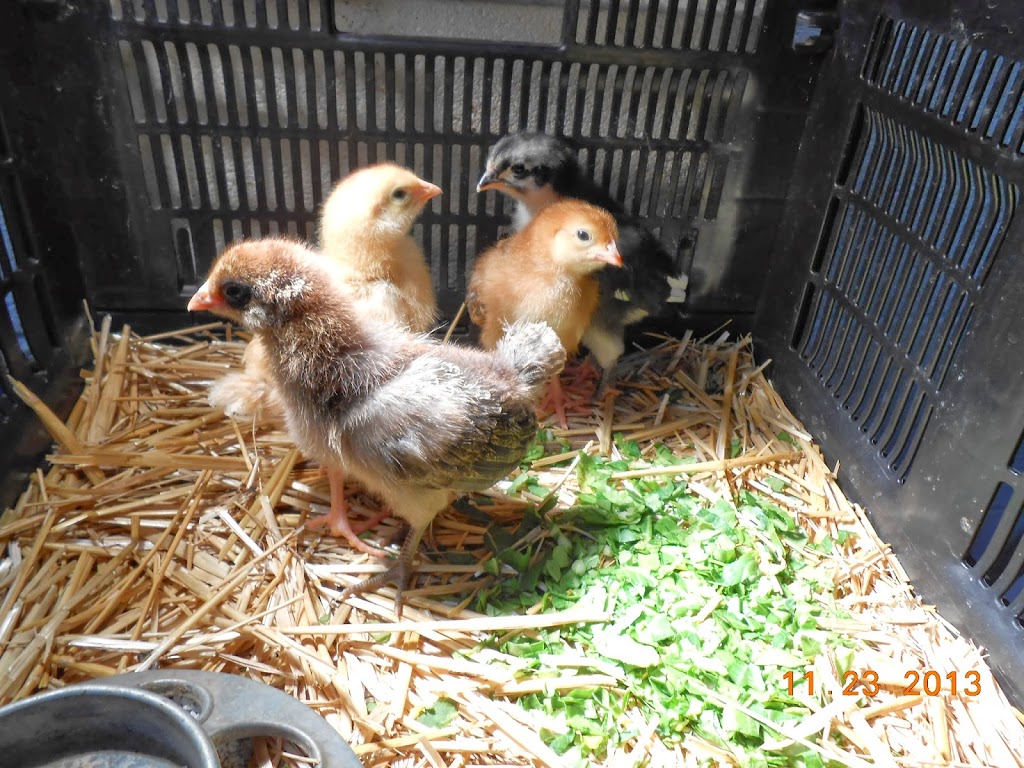
It was on the fateful day of Friday, January 17, that I finally decided the chicks could no longer stay in the indoor coop – they were just too big and I expected them to start acting out through boredom.  I’d taken them outside for a look-see earlier in the week. 
So, at the stroke of midnight, my son helped me load them into a plastic tote and take them to the hen house.  I didn’t want to wake them too much, so we didn’t turn on any lights.  I wore my camping headlamp and hoped that the local police wouldn’t find that time to drive by and we’d have to explain the intricacies of moving chickens at night!
I took each of the youth and put them in the coop.  The elder hens clucked a bit, but didn’t quite wake up.
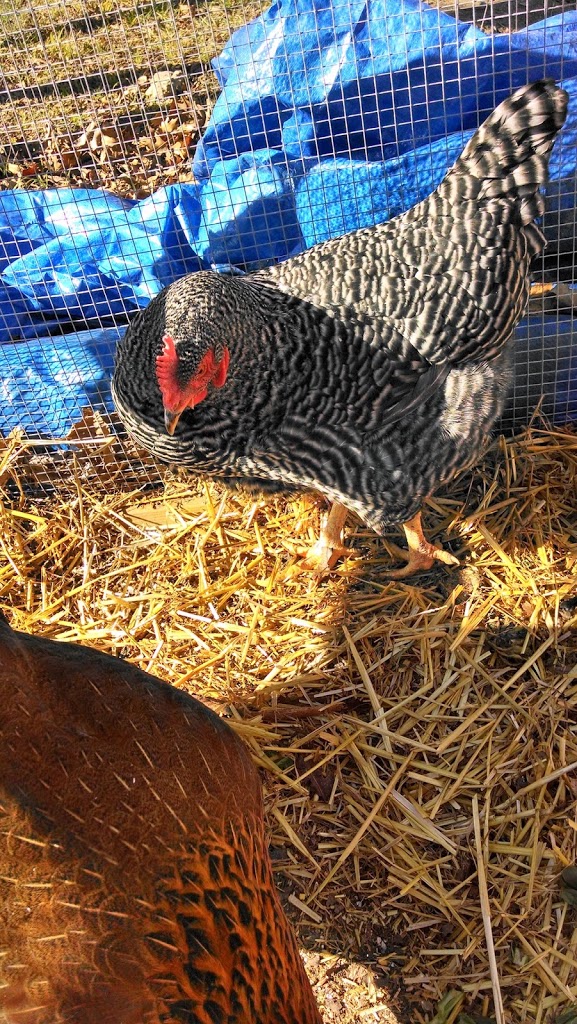
By the next morning, they were in the “basement”, the space under the coop.  Herded there by the elder hens. Later in the day, I found they were huddled at the end of the chicken run, terrorized by the elders.  I sighed and entered the run – the fully enclosed 2 foot high run – on my hands and knees and crawled toward the youth.  I wanted to herd them back into the basement where they might feel safer.  The alpha hen, Dolly the Barred Rock, took after me, squawking and flapping her wings. I brushed her back and she just settled back to cluck angrily. 
 Dolly
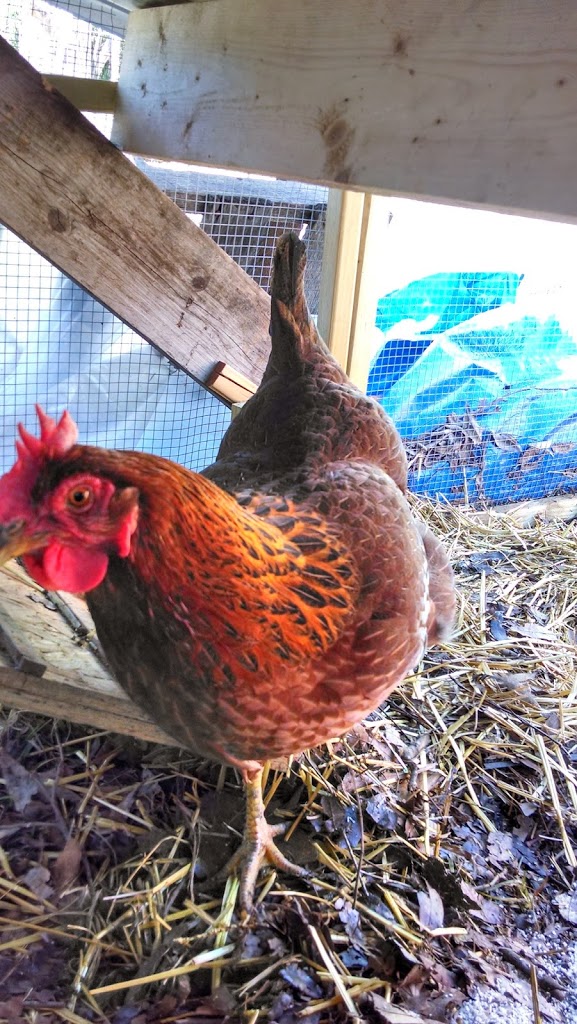
Then Penny, the Rhode Island Red, took her turn getting after me.  I brushed her back too. I finally gave up because the young ‘uns wouldn’t herd very well. So I crawled back and emerged from the run.
I was worried that the chicks wouldn’t be able to get any food and water, so I visited the coop after dark on Saturday with my flashlight.  The elders were in the coop settling in for the night, and the teens were out and partying – they were peeping away, eating and drinking and having a great time.  I set my mind at ease.Penny
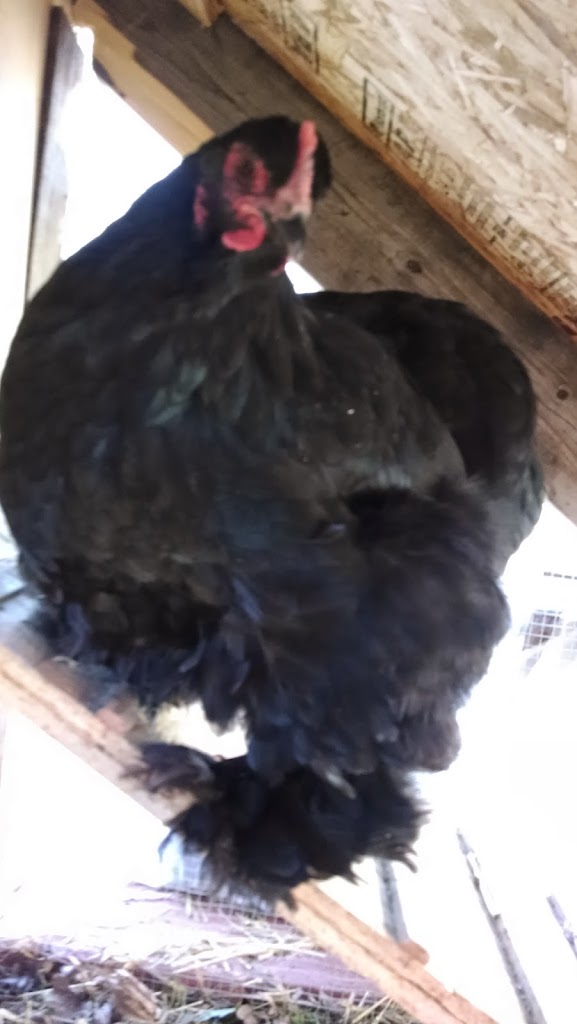
The next morning,  Sunday, the youth were again herded to the end of the run by their elders.  Every time they tried to get to the general feed and goodies, they were intimidated back into a cluster.  One of the youth, an Araucana by the name of Aury, had a bit of blood on her beak from pecking.  So I drove to the drug store for hydrogen peroxide and swabs.  My chicken mentor, Andrea,  asked me if I’d coated the young ones with Pick-No-More, which I’d forgotten to do.  So….back into the chicken run I crawled – only this time I put some straw down so I had a cleaner crawl.  I slathered each of the chicks with the PNM, then swabbed Aury with the hydrogen peroxide and then slathered her.  Neither Penny nor Dolly tried to come for me this time….they knew I was ALPHA HEN, so all they did was cluck angrily.  Penny did take a peck at one of the chicks and discovered the awful taste of PNM, so she went off.
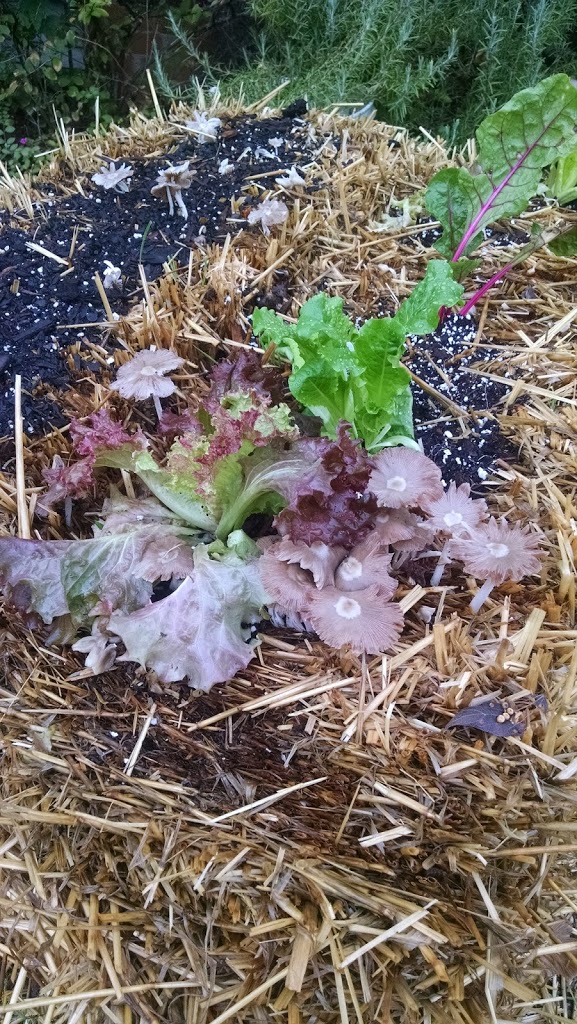
By Monday, when I found the chicks herded back into the basement, I started throwing handfuls of scratch and pellets into the understorey for them.  I also threw some greens, but C.Lo, the black cochin went after them.  So I sneaked around to the back of the coop while C.Lo was otherwise occupied and stuffed bits of greens through the hardware cloth for the chicks….they love their greens and were quite happy.
C_Lo
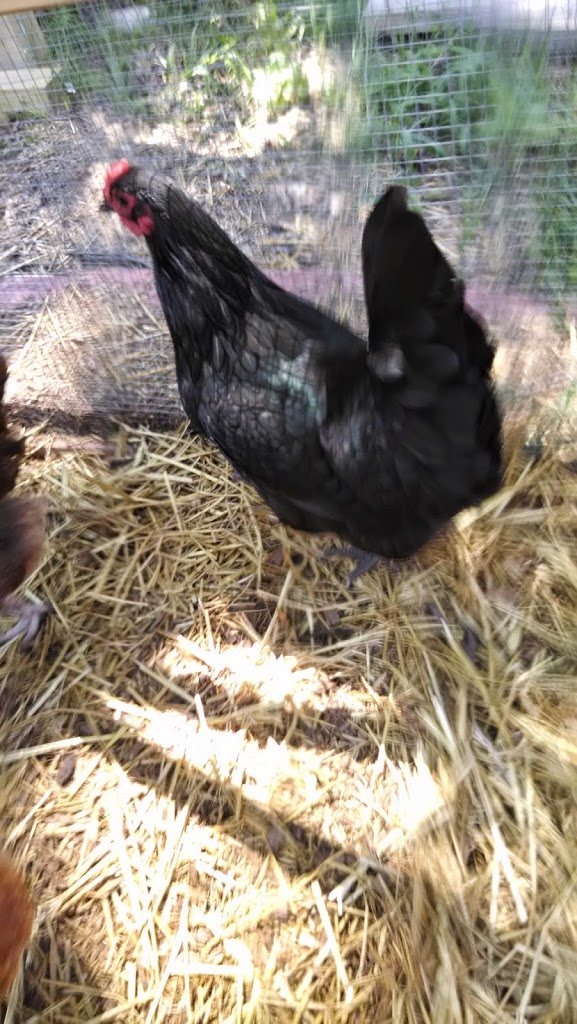
Tuesday, I knew the routine…give scratch and greens to the hens, then retire to the coop to replace pellets and water and then throw scratch and pellets into the basement.  Then I sneaked to the back and started stuffing greens.  By now, the chicks expected it and they were eagerly peeping….which alerted C.Lo, who came charging in to intimidate them and steal the greens.  I yelled at her, hissed, whistled and otherwise tried to scare her away.  She just stared at me.  I was stumped. C.Lo was the bully; none of the other hens seemed bothered by the chicks by now. 
I got to thinking about it.  C.Lo had been the one who was most friendly to people in her former home.  The other hens had come from large flocks and so were not so people friendly.  I realized that C.Lo would greet me when I put food and water into the coop area and cluck at me.  Then, when I went to the run to throw scratch, she’d come out too.  It hit me….C.Lo was jealous of the chicks!  And I was giving her negative attention, but attention nonetheless.
So I decided to change my tactics.  On Wednesday I threw scratch and greens in the run for the hens.  I also cut up pieces of pear.  But C.Lo wasn’t allowed by the other hens to partake of the pears – they jealously guarded them for themselves.  So I then went to the coop area with pellets and water and C.Lo followed.  I cut pieces of pear just for her and talked to her.  I cut greens just for her.  And the chicks ventured out to partake of pellets.  Every time she started to herd them back to the basement, I called to her and gave her another piece of greens. 
Thursday I continued the special C.Lo treatment, which seemed to be working rather well.  The chicks would make forays out to the run to pick up some goodie and then retreat to the basement area.  At least they were eating and drinking.  And then…..
The weather report said we’d get an arctic cold front with nighttime temperatures in the teens.  Ouch!  How were the chicks going to survive if they couldn’t get into the warm coop at night? I started by tarping the run, and re-stapling plastic sheeting around the coop and understorey to keep out drafts.  I gave the hens and chicks extra scratch that evening so they could have some fuel to keep them warm.  And I called my mentor for ideas – since I had no lamp in the coop for warmth, she suggested heating a brick in the over and then wrapping it and putting it into the coop. It would radiate enough heat to take the edge off.  So I heated a brick for about 45 minutes at 350 degrees, then wrapped it in an old sheet, and put it inside the understorey area.  And crossed my fingers.
Friday morning I was anxious.  When I approached the run and unwrapped  it for the sun to warm the chickens, only the hens were clucking.  I didn’t hear the familiar peeping of the chicks!  I spread scratch and greens and then went to the coop to put in feed and water.  The water was only partially frozen (that was a good sign!) … and out from the basement came all four of the chicks!  And C.Lo didn’t intimidate them either (although I did have special treats for her, too).
With the weather turning warm again for several days and, even though another cold front is coming through in a few days, it is not expected to get quite as cold as it was Thursday night. And the chicks now seem to have some freedom of movement and certainly can access food and water.  Maybe the Great Chicken Integration will happen after all and I’ll have a whole flock of 8 chickens. 
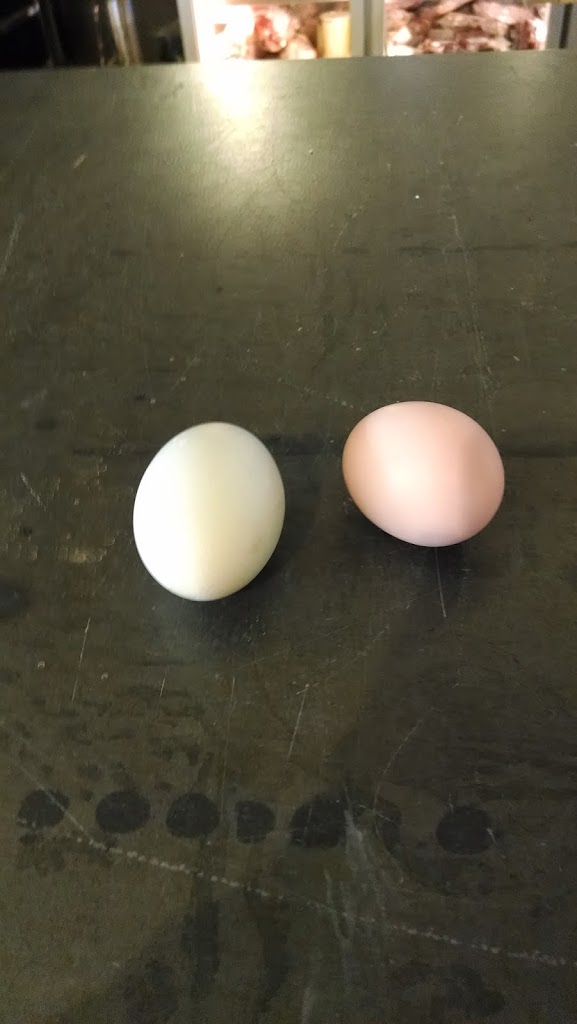
And as a bonus, I found not just the one egg (green, from the Araucana) that I’ve been finding for the past week or so, but a brown one too!  On the coldest night we’ve had, another chicken has decided to start laying.  Woohoo! 
Two-eggs

The Music of Peeps

I have to brag about the new additions to the Urban Acres Farmstead family. 

About 10 days ago I was placed in charge of 4 little fuzzyballs of peeping chicks.  The peeping subsided once they were installed in a straw-bedded crate with water and food and a heat lamp.  Full tummies helped them settle down and take a much-needed nap.

 By the third day, however, they were in need of a deeper crate, and one with a wire top – one was trying to fly to the lip of the crate to make a getaway.  Now, in their second week, they’re ready for another move – to a borrowed indoor coop that will give them some vertical room to test their wings, learn to roost and grow more.

The routine is to change their water, add fresh chick mash, more wheat straw and a half cup of chopped greens.  They seem to prefer parsley, do not care much for brassica greens, and love lettuce as well as bok choy. 

Our chicks are representatives of four different breeds – Wyandotte, Rhode Island Red, Araucana and New Hampshire.  I’ll explain a bit about each one.

The Wyandotte coloring is a speckled black and white.  It’s a traditional homestead bird, bred for both meat and egg production.  The silver-laced variety was first standardized in 1883 in the US.   Wyandottes can look heavy due to their feathering.  Eggs are light tan to brown, and they are medium to high egg producers.  A Wyandotte hen can weigh up to 7 pounds.

The Rhode Island Red is a very well-known bird and it was developed for both meat and egg production.  It’s adult color is deep red, and egg color is a light brown.  As a high egg producer, a Rhode Island hen can lay up to 250 eggs a year.   Historically this has been a reliable bird for beginners because it can adapt to extremes of climate.  An adult Rhode Island Red hen can be about 6 pounds.

 The Araucana can grow to 5-6 pounds, and originated in South America (Chile), but the breed was imported to the US in the 1930s. It is a “crested variety” and has ear tufts on either side of its head.  Araucanas are hardy and can handle poor weather conditions easily. They are known as the “Easter Egg” chickens, because their eggs can be tinted blue or green.  Our little Araucana may reach 5-6 pounds when she’s an adult.

Our New Hampshire Red is also a US breed, developed during the early 20thcentury, but became popular in Europe in the mid-twentieth century.  It was primarily developed for egg production.  The eggs are light brown to brown. This chick may top out at about 6 pounds or so.

I’ve found a couple of good references on chickens that are helping to update my knowledge of chicken keeping (since the last time I kept chickens was a good 30 years ago!):

Dr. Joseph Barber (ed.), The Chicken: A Natural History. Lewes, East Sussex, UK: Ivy Press, 2012.

Christine Heinrichs, How to Raise Chickens: Everything You Need to Know. Minneapolis, MN: Voyageur Press, 2013.

Suzie Baldwin, Chickens: The Essential Guide to Choosing and Keeping Happy, Healthy Hens. London, UK: Kyle Books, 2012.

And for chicks:

Jenna Woginrich, Chick Days: Raising Chickens from Hatchlings to Laying Hens. North Adams, MA: Storey Publishing, 2010.


Contentment is….

Don’t know when I’ve felt so content and peaceful.  Weaving on Rug #2, a combination of deep blue/grey print sheet and a deep rust red.  In the background (thank you Best Buy for new speakers!) I have music playing – of course it’s Nama Orchestra’s Best, a compilation of their folk dance music.  Brings back pleasant memories of folk dancing with the village friends!

Here’s the rug with the first two stripes finished.  Have to call it quits for today – the light is fading and it’s best to weave with natural daylight.

Fabric Destashing Extravaganza!

Friends, I’m destashing all that fabric that’s been in my closet for the longest time.  All fabrics are from nonsmoking home.  I acquired them with the intention of making clothing for me and my kids when we were active in Civil War reenacting. 

Please email me (anitam48@gmail.com) with a number corresponding to the piece you’re interested in, and where you are.  I will weigh for shipping and send you a PayPal invoice.  Alternatively, if you live in the Dallas area, I am willing to meet you within a 40 miles radius and deliver. 

Individually, the pieces would cost $283.50.  However, if you take the lot, the cost is $200 plus shipping.

Here’s the list:

#1 – Grey melton, wool. I wanted a great coat so badly, and was going to fashion one for those cold winter encampments. 60″ wide, 6 yds.  $5/yd = $30

#2 – SOLD – Grey Linsey/Woolsey – 60″, 2 1/2 yds @ $5/yd = $12.50
This is a piece of a special order woven for Confederate impression.  It could make a pair of pants for a young man who wants to look like his dad.

#3 is a lightweight cotton plaid – dark red, cream and blue. It was going to be a summer-weight dress.  It’s 45″ wide, and there are just over 6 yds.  I’m asking $2/yd so that’s $13 for the piece.

#4 is another plaid – a green and cream cotton, 42″ wide, and there’s about 9 yds in the piece.  This was another dress – probably for my older daughter who looks so good in greens!
At $2/yd that’s $18.

#5 is a lightweight cotton plaid, with red, black, gold and white.  The piece measures 6.5 yds of 45″ fabric.  At $2/yd that’s $13.

#6 is a cotton plaid of green, blue, cream and dark red.  It’s 45″ and  measures 8 yds; at $2/yd it would be $16.

#7 is a cotton plaid of red, black and cream with a green accent.  It’s 45″ wide and just over 8 yds long.  $2/yd = $16

#8 is a cotton plaid of blue and cream with a dark red accent.  It is 42″ wide and consists of two pieces:  One is 6 1/3 yds and the other is 1 yd.  At $2/yd, I’ll say $14.50.

#9 is a plaid of light blue and pale yellow.  I had gotten a pattern for an 1880s day dress and make it up in a darker check.  When I read the documentation of the dress the pattern had been taken from – it was a light blue and pale yellow plaid!  Sure enough, I had it in my closet.  But never made the other dress.    It’s of cotton, 44″ wide.  There are 10 yds in this piece.  $2/yd = $20

#10 is a green floral cotton with large roses, 44″ wide and 11 yds long.  $2/yd = $22


#11 is a small pink on white floral cotton.  It says on the margin, “Concord fabrics 25th anniversary special edition country floral.”  It’s 42″ wide and there are two pieces:  one is 5.5 yds and the other is 1.5 yds for a total of 7 yds.  $2/yd = $14

#12 is a black crepe-type fabric.  It’d thought about making a mourning dress of it, because it drapes so well.  The content is undetermined.  It’s 60″ wide and there are 11 yds in the piece.  At $3/yd so it would be $33 for the piece.  Sorry – the camera shows it as grey, but it is pure black – it must be the texture that is causing the reflection.

#13 is a lovely orange floral cotton.  It is 45″ wide and a little over 7.5 yds.  @$2/yd, that’s $15.

#14 is a small dark red floral on lighter red.  It’s scrumptious.  Cotton, 42″ wide.  There are 4 yds, so that would be $8.

#15 is a light cotton plaid with purplish red as the dominant color.  It’s 36″ wide and there are just over 5 yds in the piece.  I’ll only as $1.50/yd for this one.  That’s $7.50 for the piece.

#16 is a small tan print cotton.  Very subtle and lovely.  It’s 44″ wide, and 7.5 yds long.  At $2/yd that’s $15.  Well, it looks more white – sorry – the tan just didn’t show up well. 

$17 is a brown on brown small floral cotton, 42″ wide.  It’s 8 yds long so at $2/yd that’s $16.

There!  That’s the lot out of that closet!  Again, let me know what you’re interested in (email to anitam48@gmail.com) and I’ll weigh it for shipping costs and send you a PayPal invoice.  Or you could pick it up in Dallas.  If you buy the lot or several pieces, I could even be persuaded to meet you within a 40 miles radius of Dallas. 

Happy sewing!

Anita

Back to Weaving….

It felt so good today to actually begin weaving again. I fired up the old Reed Cambridge rug loom, taking a while to get the warp on and thread it all up. But now I’ve started a denim rug and it feels so good – weaving is so tactile. And it’s zen…just the next throw of the shuttle, working to keep selvedges even, making sure no threading errors creep in. It’s total focus. Now I need to prepare more denim strips for the next round. Here’s a picture of what I did this morning.

Tales of Bayou, Rescue Cocker

After visiting with the DFW Cocker Rescue folks at a meet and greet in late April, I went through the very thorough adoption application process. Although my first heartthrob was adopted in the meantime, I went to the special needs/senior dog meet and greet and met Bayou.

Now this little guy is a “senior” at 9 years or so, and has cataracts. But his little tail doesn’t stop wagging and I don’t think he’s ever met anyone he didn’t like!

I prepared my home for him, and worked out an exchange point and time with his foster mom. I’m fostering him for the moment. But I’ve lost my heart.

He looks like a little old grizzled man with bushy eyebrows and a bit of a bushy mustache, bushy hair on top. Here’s his official photo.

We got off to a rocky start, as Bayou and Little Bit (the “tiny” cat) became acquainted, and Bayou learned of his place within the pack. Following are a couple of progress reports I sent his previous foster mom.

6/13/12 The cat and Bayou just stared at each other in the kitchen last evening. Bayou didn’t know what to do with this strange type of dog, and the cat was cautious. Later, as I read in the living room, Bayou was asleep on the couch, the cat sprawled on the coffee table, and the lab in the middle of the floor. Then the cat decided to go over to the side table (on Bayou’s end of the couch), Bayou was startled and jumped, cat freaked, there was a blur, with cat launching off my arm (I have wounds to prove it!), and Bayou on his back yelping. No damage, just scared. He went over to my chair, crying and the lab and I went over and comforted him. The cat has maintained a ghostly appearance, and Bayou seems to be ignoring him. (The cat is about Bayou’s size and is willing to live and let live.) Wasn’t that exciting?! 🙂 So then we went up to bed, and I moved the beagle’s little bed over close to my side of the bed. Ha! When I climbed in, Bayou presented himself with paws on the bed and looked at me. I lifted him up, he cuddled and then went to the foot of the bed and curled up. We did have a middle of the night visit to the backyard, which Bayou announced by not climbing into bed with me again when I got up for my bathroom break. He’s a bit anxious about going out without my standing watching. That’s okay, because it’s strange. He is glue to me now, but learned that the lab also has access to me, when he tried to be non-sharing last night. He just needed some reminders about behaviors in the pack. Meanwhile, he appears to like our filtered water! 🙂 My son loves him. He reminds me of a grizzled old man from the mountains, with big bushy brows, tousled hair and maybe a bit of a beard. He’s so cute!

6/14/12 I sure do appreciate your handholding last night. And your suggestion as to how to handle our little escape artist! I’m also getting another tag for him with my number on it. So I put your suggestion right to use, because I had to run off to church. I went to the door (with treats in my pocket), and he followed eagerly; you could tell he was primed for another foray outside. As I opened the door, I turned to him and said, “Bayou! Stay!” He stopped and looked at me, and the look in his eyes said, “Oh, drat! She knows!” It was so funny. I gave him a treat then and closed the door. Taking that as a hint that he was a kid testing limits, I started this morning with a feeding routine. Everyone had to “sit” while I prepared the meal, instead of crowding in close. Bayou had been rather laissez-faire about that, sort of like he wasn’t sure how to “sit.” He obviously knows sit and stay. He kept getting up, and I’d just make him sit and stay again. Very orderly meal time – same as I would do when I had a third dog (my daughter’s pointer) visit. So basically, the jig is up. I’m in control. (I had control issues with the lab and still do periodically. I’ve found that the “sit” command sort of re-establishes our hierarchy in the pack.) By the way, he and my son seem to be getting along quite well. Not only were they on the couch together when I got home last night, but while I was in the shower and getting dressed this morning, Bayou moved into my son’s bed and didn’t follow me downstairs until he was good and ready! 🙂

He made a trip to the vet (ophthalmologist) yesterday and is deemed a candidate for cataract surgery! He just might be able to see well again! But the cocker rescue group needs to raise funds to cover the surgery. Anyone so inclined can go to Their website at www.dfwcockerrescue.org and make a donation in his name.