Greenhouse Installed! Hugelkultur Bed Greens Are Thriving

As the weather turns colder, we are getting serious about growing food for the winter. Yes, we can grow year-round in the DFW area.

Hugel greens

The hugelkultur bed out front is covered with greens – mostly mustard and collards, with some chard. The mustard is taking over and is now soaking up the wonderful light drizzle.

Meanwhile, the greenhouse has been reassembled and tied to the deck out back.  It will allow us to start seeds for herbs for the spring, as well as cultivate Malabar spinach from cuttings we obtained a month or so ago (the porch kitties keep trying to eat our attempts to start it on the front porch!).

The peek inside shows supports where I’ll be installing the shelves.  The greenhouse itself is pretty roomy, with room for up to 4 flats of seedlings on the shelves and another couple on the ground underneath.  I can even walk in!  It’s about 36″ deep (I know, because I assembled it indoors and it barely fit through the 36″ doorways on the way out to the backyard!)

Greenhouse compact

The greenhouse (a Gardman) is a kit that I bought a couple of years ago, then stacked and stored sometime last year.  It is compact, and stores in a minimal space when not in use.  It is remarkable for a kit – in February 2014 when it was freezing outside, I unzipped the door and walked into a warm, humid environment.  Not exactly 60 or so degrees, mind you, but certainly very much above freezing and seedlings were thriving.

Greenhouse inside

One caution on greenhouses – when it rains, the plants do not get water!  Now that might seem intuitive, but I speak from experience – I keep a watering can inside the greenhouse for dowsing seedlings.

Compost and Hugelkultur

We’ve been busy here at the urban homestead….

compost now

First, we salvaged several pallets to start a measured compost pile.  Now, there are many ways of composting – from piling some vegetable matter in a heap and walking away … for as much as a year. After all everything composts eventually. All the way to the 18-day Berkeley method that requires careful building and turning religiously throughout the 18-day period.

I chose to go with a medium-time way.  Pallet-walled bins that allow turning on an occasional basis.  We’ll have compost within a month or so.  In fact, much of the vegetable matter that went into the bin were composting of themselves in the plastic bags!  With the chicken-coop litter, nitrogen was incorporated to help heat the pile up.  Made sure it was damp and then covered it with a tarp.

compost site bins

It was great to have the bins made…I’d been using old tree-planters and before that a little galvanized can.  The bin method will suit me, because I’ve been expanding my planting areas in the front yard and will need a bunch of compost to complete it.

We cleared the backyard of downed and cut branches and sticks and put them on the street for the bulk pickup.  But THEN…. we decided to start another growing bed – in the ground, actually, rather than in a container (!).  So we took the pile down by half by laying out the sticks and branches to form a narrow, curving bed to follow the walkway in a portion of the front yard.

hugel sticks

Then, because my straw bales had seen better days for growing (after all, they had survived two seasons!), they went on top of the sticks, mixed in with some leaves I begged off the landscapers at my bank.

Next, we’ll put more vegetable matter on the bed, then top it all off with mulch and plant.

Hugel straw layer

This type of bed is called “hugelkultur” which is a technique that has been used in Eastern Europe for centuries.  (See my earlier postings on hugelkultur – they are more detailed.)  BUT….the essential thing about this technique is that it retains water.  That’s what we need in dry times, like we’re having now.  As the wood on the bottom decomposes, not only does it serve as a habitat for fungi, particularly mycorrhizal fungi (which are so important for the soil food web), but the wood becomes like a sponge and holds water.

Remember this – if nothing else – the more organic matter we can put into the soil, the more water it will hold when it rains, and the less you will have to water your plants!

Fall is Here! Egg Production Up… and Strawbale Class coming


image


Fall is here, and egg production is beginning to ramp up in the coop.  I guess it’s the cooler nights and not-so-hot days.  All three Ameraucanas are now laying….with an occasional egg from the Rhode Island Red.  But I’m still waiting for the Black Cochin and Black Austrolorp to come online.  I’ll supplement their feed with some more protein – yummy meal worms and maybe some calcium to help them along.


I was reflecting the other day how going out to take care of the chickens in the morning has become a time of untime.  I move into a zen and no-time, as I care for them, cluck at them and generally carry on the morning conversation.  It would seem odd to hurry through the routine.  Chickens truly are a stress reducer… ask anyone who has sat and watched them scratching as they foraged.

I’ll be teaching strawbale gardening on October 3, Saturday, 10 am at Trinity Haymarket (1715 Market Center Blvd).  The class is free, and the proprietors Bill and Fred have coffee and pastries to munch on before the class begins.  You can learn how to condition strawbales organically to grow (especially) greens for the winter.  Strawbales are excellent choices for a temporary garden, a garden for not bending over, or just plain fun!  and when the season or two the bales last are over, you have COMPOST!

Also come and check out Trinity Haymarket’s new offerings – Sojos freeze-dried, no-grain dog food.  Super nutritious, as well as local honey, chicken and bee supplies as well as organic garden supplies.  It’s like an old-time feedstore and really fun to visit.

Fall Planting – Mulch and Crop Rotation A Must

So fall is upon us. Just like spring, it’s time to think about planting!   So what do you consider? First, there’s mulch and feeding the soil. Second it’s planning what to plant – and that means rotating crops.

Mulching

Mulch, mulch, mulch. That means don’t till. Do you know what happens when you turn over the soil? You destroy this whole civilization of micro-organisms that are just waiting to help your plants grow! Can’t you hear the screams?

Okay….maybe I’m exaggerating a bit, but there is a whole world of life in the soil ecosystem. It starts with mycorrhizal fungi that form the base of the pyramid. These little folks send out microscopic hairs, called hyphae that go through the soil and grab minerals and nutrients and bring them to plant roots.

What happens when you till or turn over the ground? Those miles and miles (yes – in a small space!) of hyphae are broken and have to re-grow. Which takes time that they could otherwise be feeding your plants.

Instead, add organic material on top of the ground – like leaves, or compost, or mulch. That way, you’re giving the bacteria (who also live below-ground) something to munch on and add to the fertility of the soil – as well as its moisture tolerance.


Crop Rotation

Certain plants grow best when they are planted after another type of plant. For instance,

Legumes (think: beans and peas mostly) fix nitrogen from the air to the soil for leafy plants.

Leaf Plants (as in coles, leafy greens and corn) like lots of nitrogen. They grow best when planted after the legumes.

Fruits (as in tomatoes, eggplant, cucumbers, squash and melon) like phosphorus to set fruit, but too much nitrogen prevents them from setting the fruit. They just grow and grow and grow, but don’t set fruit.

Roots need even less nitrogen, but they need potassium. Roots include beets, carrots, turnips, radishes, garlic and potatoes.

Then cycle through again.

It’s also important to note that when you plant certain things in the same place year after year, they get covered with pests – like tomatoes get covered with hornworms. So never plant tomatoes in the same place year after year. Even if that is the best sunny spot.

So Rotate, Rotate, Rotate.

A Squash Resistant to Those Borers!

At the recommendation of a gardener at Homestead Heritage in Elm Mott, Texas (a great place to visit! or take classes!  http:// www.homesteadheritage.com) I tried Tatume Squash this year.

She told me that it was resistant to squash vine borers. Since I have been plagued by them, and the only remedy that seems to work is to inject starts with bt, I decided to give it a try. I’m a bit lazy in my own garden and have been seeking other ways of avoiding the dreaded vine borer.

But a warning is in order … this plant SPREADS! I’ve been redirecting runners from the neighboring tomato (which is doing its own spreading into the rosemary close by) and sending it towards the lawn. The seed catalog says iit can send runners up to 15 feet or more. So leave it lots of room.

You can still plannt Tatume by seed. It’s a native of Mexico, but available from Baker Creek (www.rareseeds.com).

I have two plants and have started harvesting. I cut off my first squash – all of about 3-5 lbs! I was leary of a woody fruit, because that’s what you get with zucchini that gets away from you.

image

I was surprised … it was just like a BIG small zucchini inside. I cut large slices about 1/2 inch thick, slathered with olive oil, garlic and pepper, and fried it in the cast iron skillet. When it was browned, I added a bit of water to help it cook. You could also grill it.

It was very tasty. Next, I’ll try cubing it and cooking in a stew with some Rotel tomato/pepper, garlic and onion, for serving over rice.

I’ll probably let the next squash get a bit bigger to see how it fares cooking and eating-wise.

Drought Planting Technique Works in Flood….and Carrots

A few weeks ago, I wrote about planting techniques that worked in drought conditions.  Now it’s apparent that heavy mulching also works in flood.

A garden columnist recently recommended that gardeners just pull their spring tomato plants and give up until fall planting. The reason was that so many tomato plants were suffering from the abundance of rain, and suffering from fungus and other ills caused by wet conditions and wet feet.

Tomatoes may 2015

However, as you can see from the pictures, tomatoes planted using heavy mulch – and in some cases only mulch – fared quite well and are flourishing and producing tomatoes.  The tomato plant in my straw bale also is doing well, blooming and getting ready to put forth tomatoes.  In addition, my container tomato just yielded a lovely cluster of cherry tomatoes.  It is not suffering either.

The secret?  DRAINAGE.  As long as the days are long, there are a reasonable number of days in the 80s, and the plant’s feet are wet, the tomato will be just fine.


What about fall tomatoes?  There are a couple of ways to achieve this without going out and buying new transplants (although it’s nice to support local businesses).

First, June is the time to start seeds so that your seedlings will be ready to plant in time for a fall crop.

Second, the suckers that develop at the junction of each tomato branch can be removed and placed in a rooting mix to develop roots and should be available for transplanting in time for a fall crop.

Finally, there is the lazy person’s way…just prune those plants that are doing well.  Tomato branches that have borne for the spring will be less likely to bear fruit for the fall.  So, prune them off during the heat of the summer when production has fallen off.  Those suckers I mentioned earlier?  Leave them and they will develop new branches, ready to bear at the right time.  You can get two crops off the same plant, without the labor of transplanting or the expense of buying new transplants.


Carrots Carrots 2

I mentioned some time ago that I “winter” plant my carrots.  With the cold weather, their growth and maturity has been delayed, but they are now ready for harvest.  Since the carrots were lonely in their container, I transplanted a couple of tomato plants to keep them company this spring.  As the tomatoes have now grown and need space, I started harvesting carrots.  Wow – was I surprised (I always am)!  Here’s a picture of the harvest of these few.  There are many more waiting.  They are bound for a roasting with some red potatoes and onions, chunked and covered with olive oil and a sprinkling of time.  Add a little water and cover the roaster, then put in the oven for an hour or till everything is nice and tender.  Another lazy person’s dinner – and so delicious!

Carrots 1

Gardening During Drought – Part 2

In Part 1 we covered ways in which you can use compost and mulch in an existing garden bed to reduce water usage.

Now we will tackle a way to set up the garden bed to reduce water needs from the get-go!

hugelkultur bed

I’ve talked about the method before – it’s called Hugelkultur, and it hails from Eastern Europe.  Hugelkultur has been used for centuries, but it’s only become more popular after the publishing of  Sepp Holzer’s Permaculture.

Hugelkultur works to conserve in two ways:  Not only does the technique use all those trimmings from yard waste that go to the landfill, but the whole bed acts as a water sponge.

That certainly works well with water restrictions in North Texas communities and reduces water bills. I’m going to repeat what I have written before – a 100 sq. ft. bed planted in vegetables is expected to need 60 gallons of water weekly – at least.

I would love to see hugelkultur used in setting up school gardens.  The reason is that school gardens are often promised water from the district for only the first year – after that, the garden manager has to devise other ways of providing water – usually rain capture. But reducing water needs is critical, whether the district pays the bill or rain is borrowed.

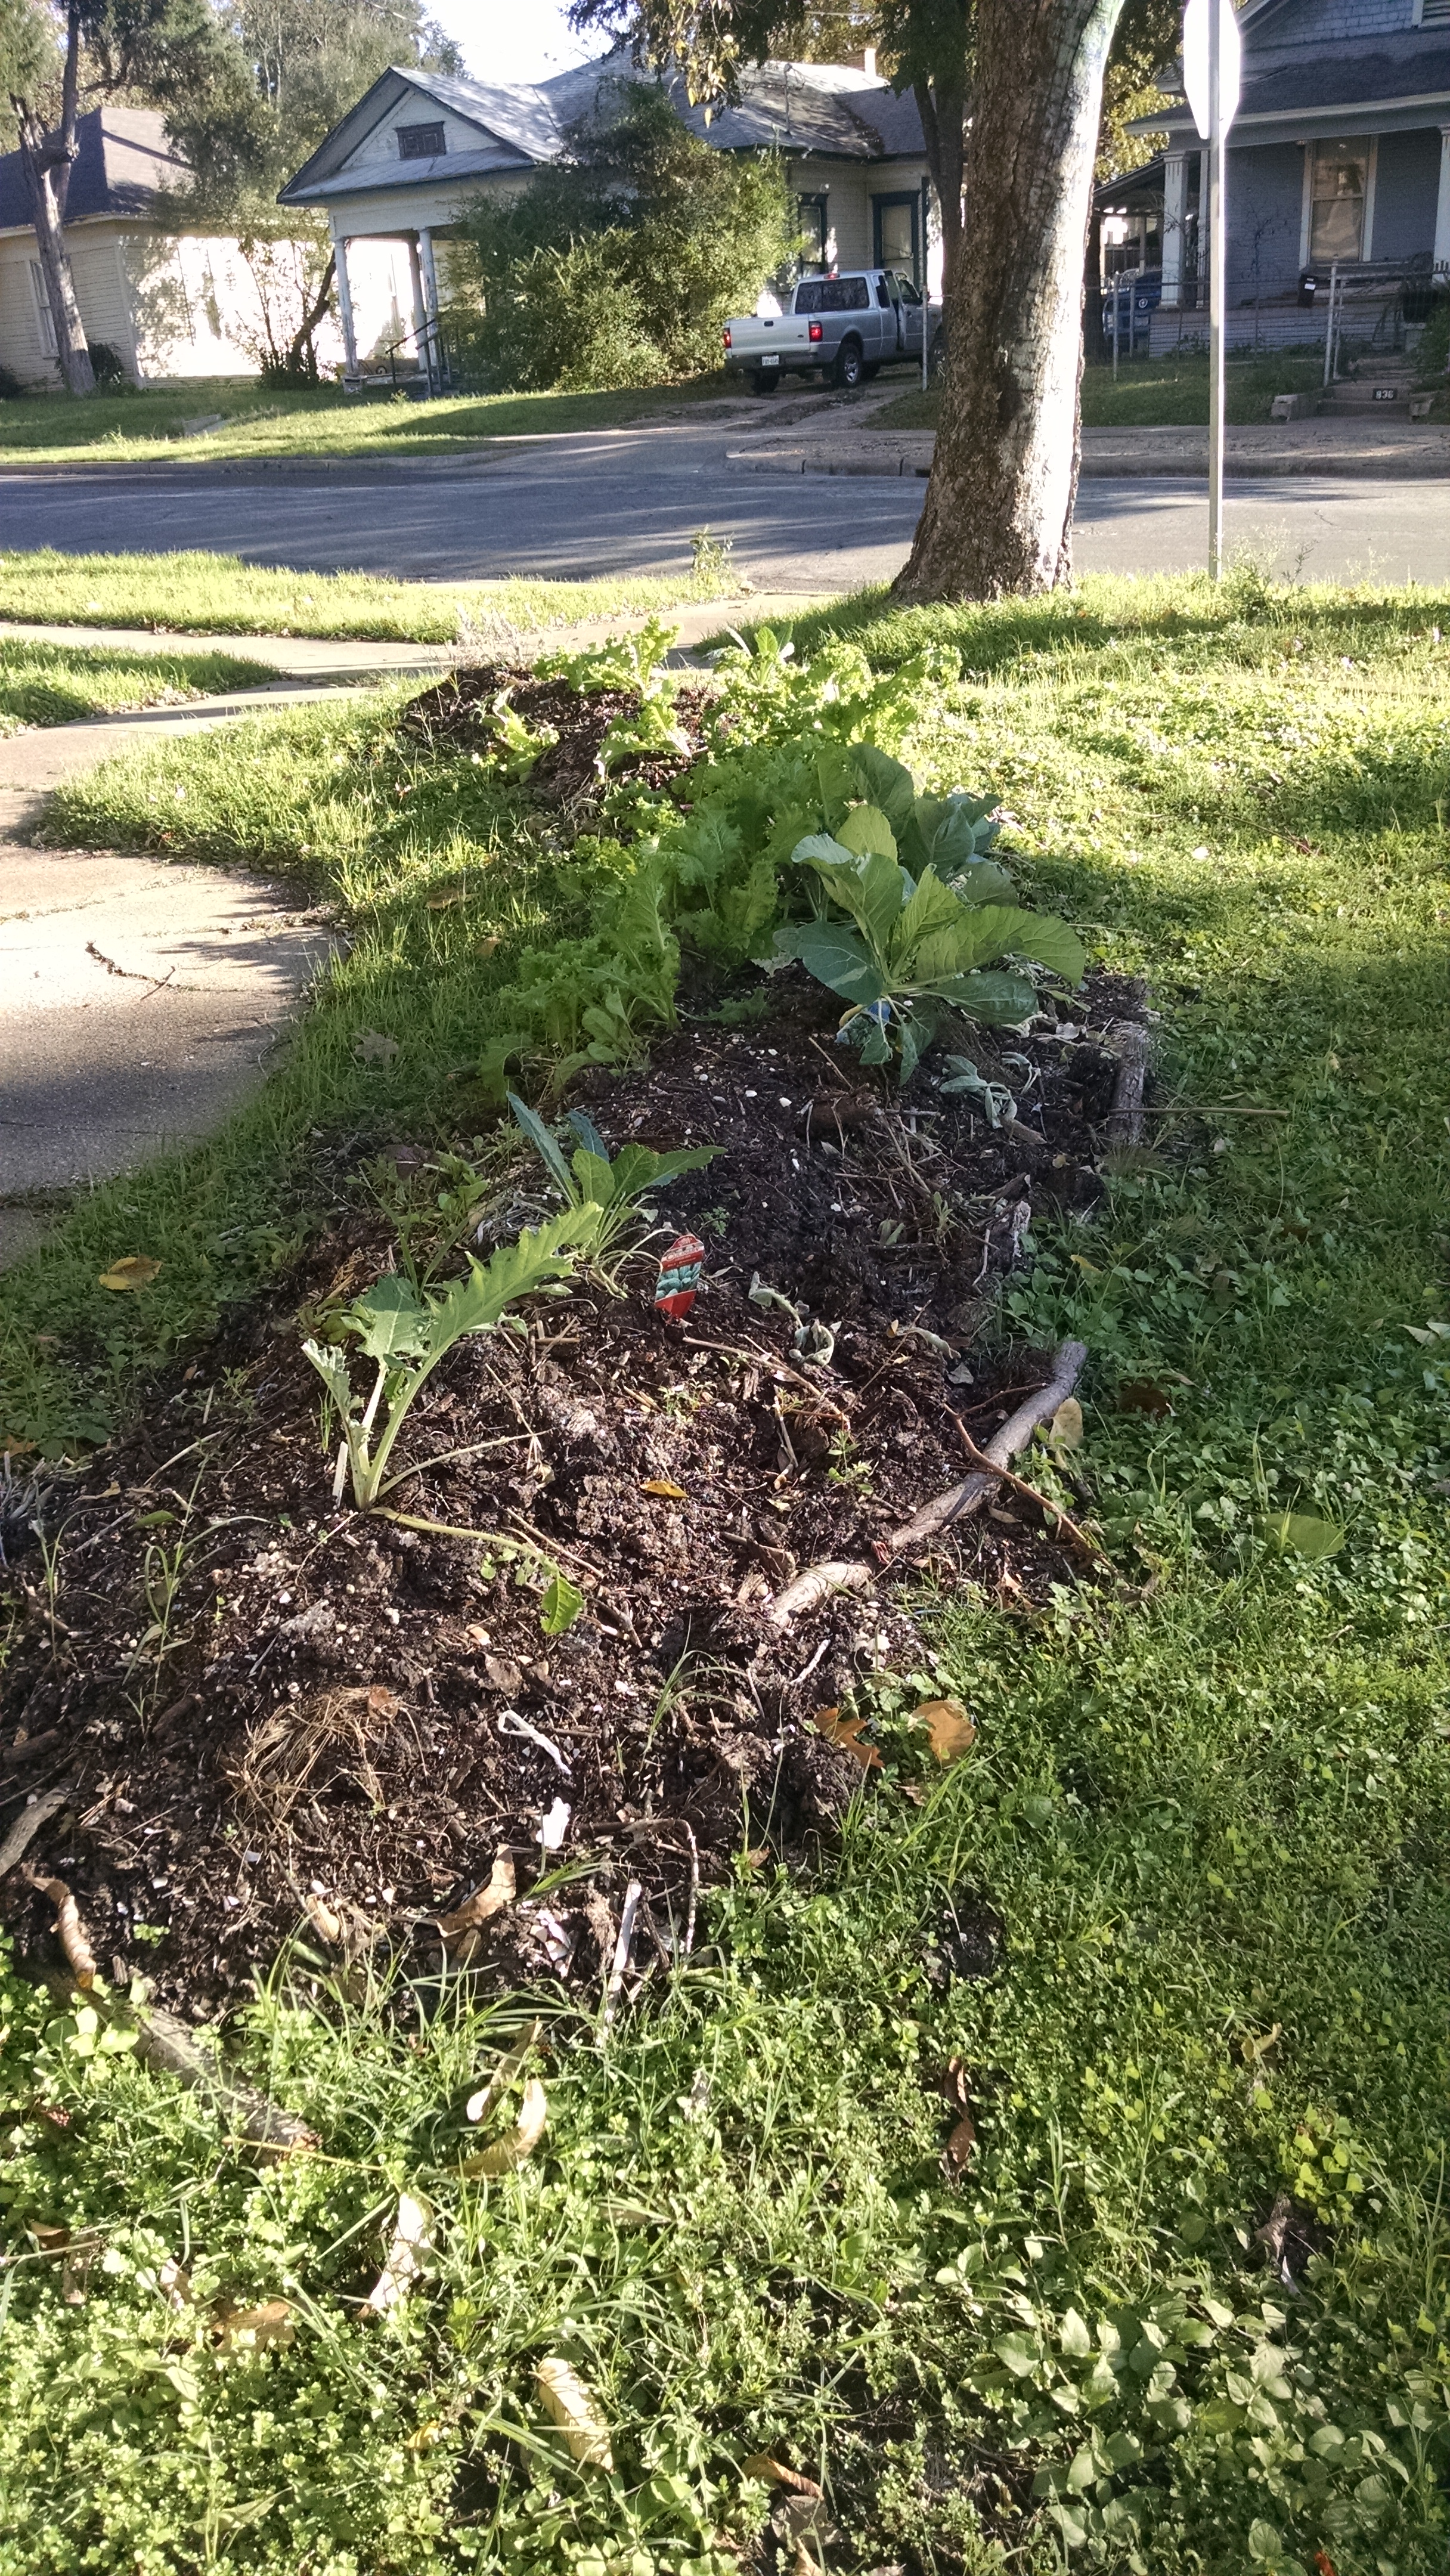
Basically, hugelkultur copies what we find in a forest floor – dead and rotting trees, covered with limbs that fall, then by leaves which decompose and we have a soft, cushiony bed in which all sorts of life thrives.

Here’s what happens:  the logs (old or new) rot and become porous. They serve as excellent habitat for mycorrhizal  fungi, which are essentially for healthy plants.  AND, as the wood rots, it acts as a sponge for water.


The end result is that hugelkultur beds don’t need to be watered nearly as often.  I talked to a community garden manager last year, asking about the experimental bed she had put in.  She stated that in October they had built the bed, planted broccoli, cauliflower and cabbage and – when I talked with her in February – they had still not watered since the bed was planted!

Hugel container logs

Traditionally, the hugelkultur process starts with a trench in which logs are placed, then twigs, then leaves, then compost and soil on top.  It can be anywhere from a foot high to several feet. It all depends on where you live, what you want to put into it, and how high you want it to go. You can even install a hugelkultur bed for ornamentals that your HOA will approve of – just start with a trench and only go as high as 12” for the mound.  Many front yard plantings go that high with mulch on top.

Hugel container sticks

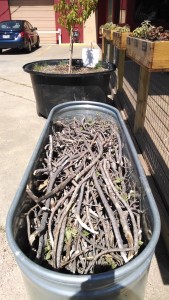
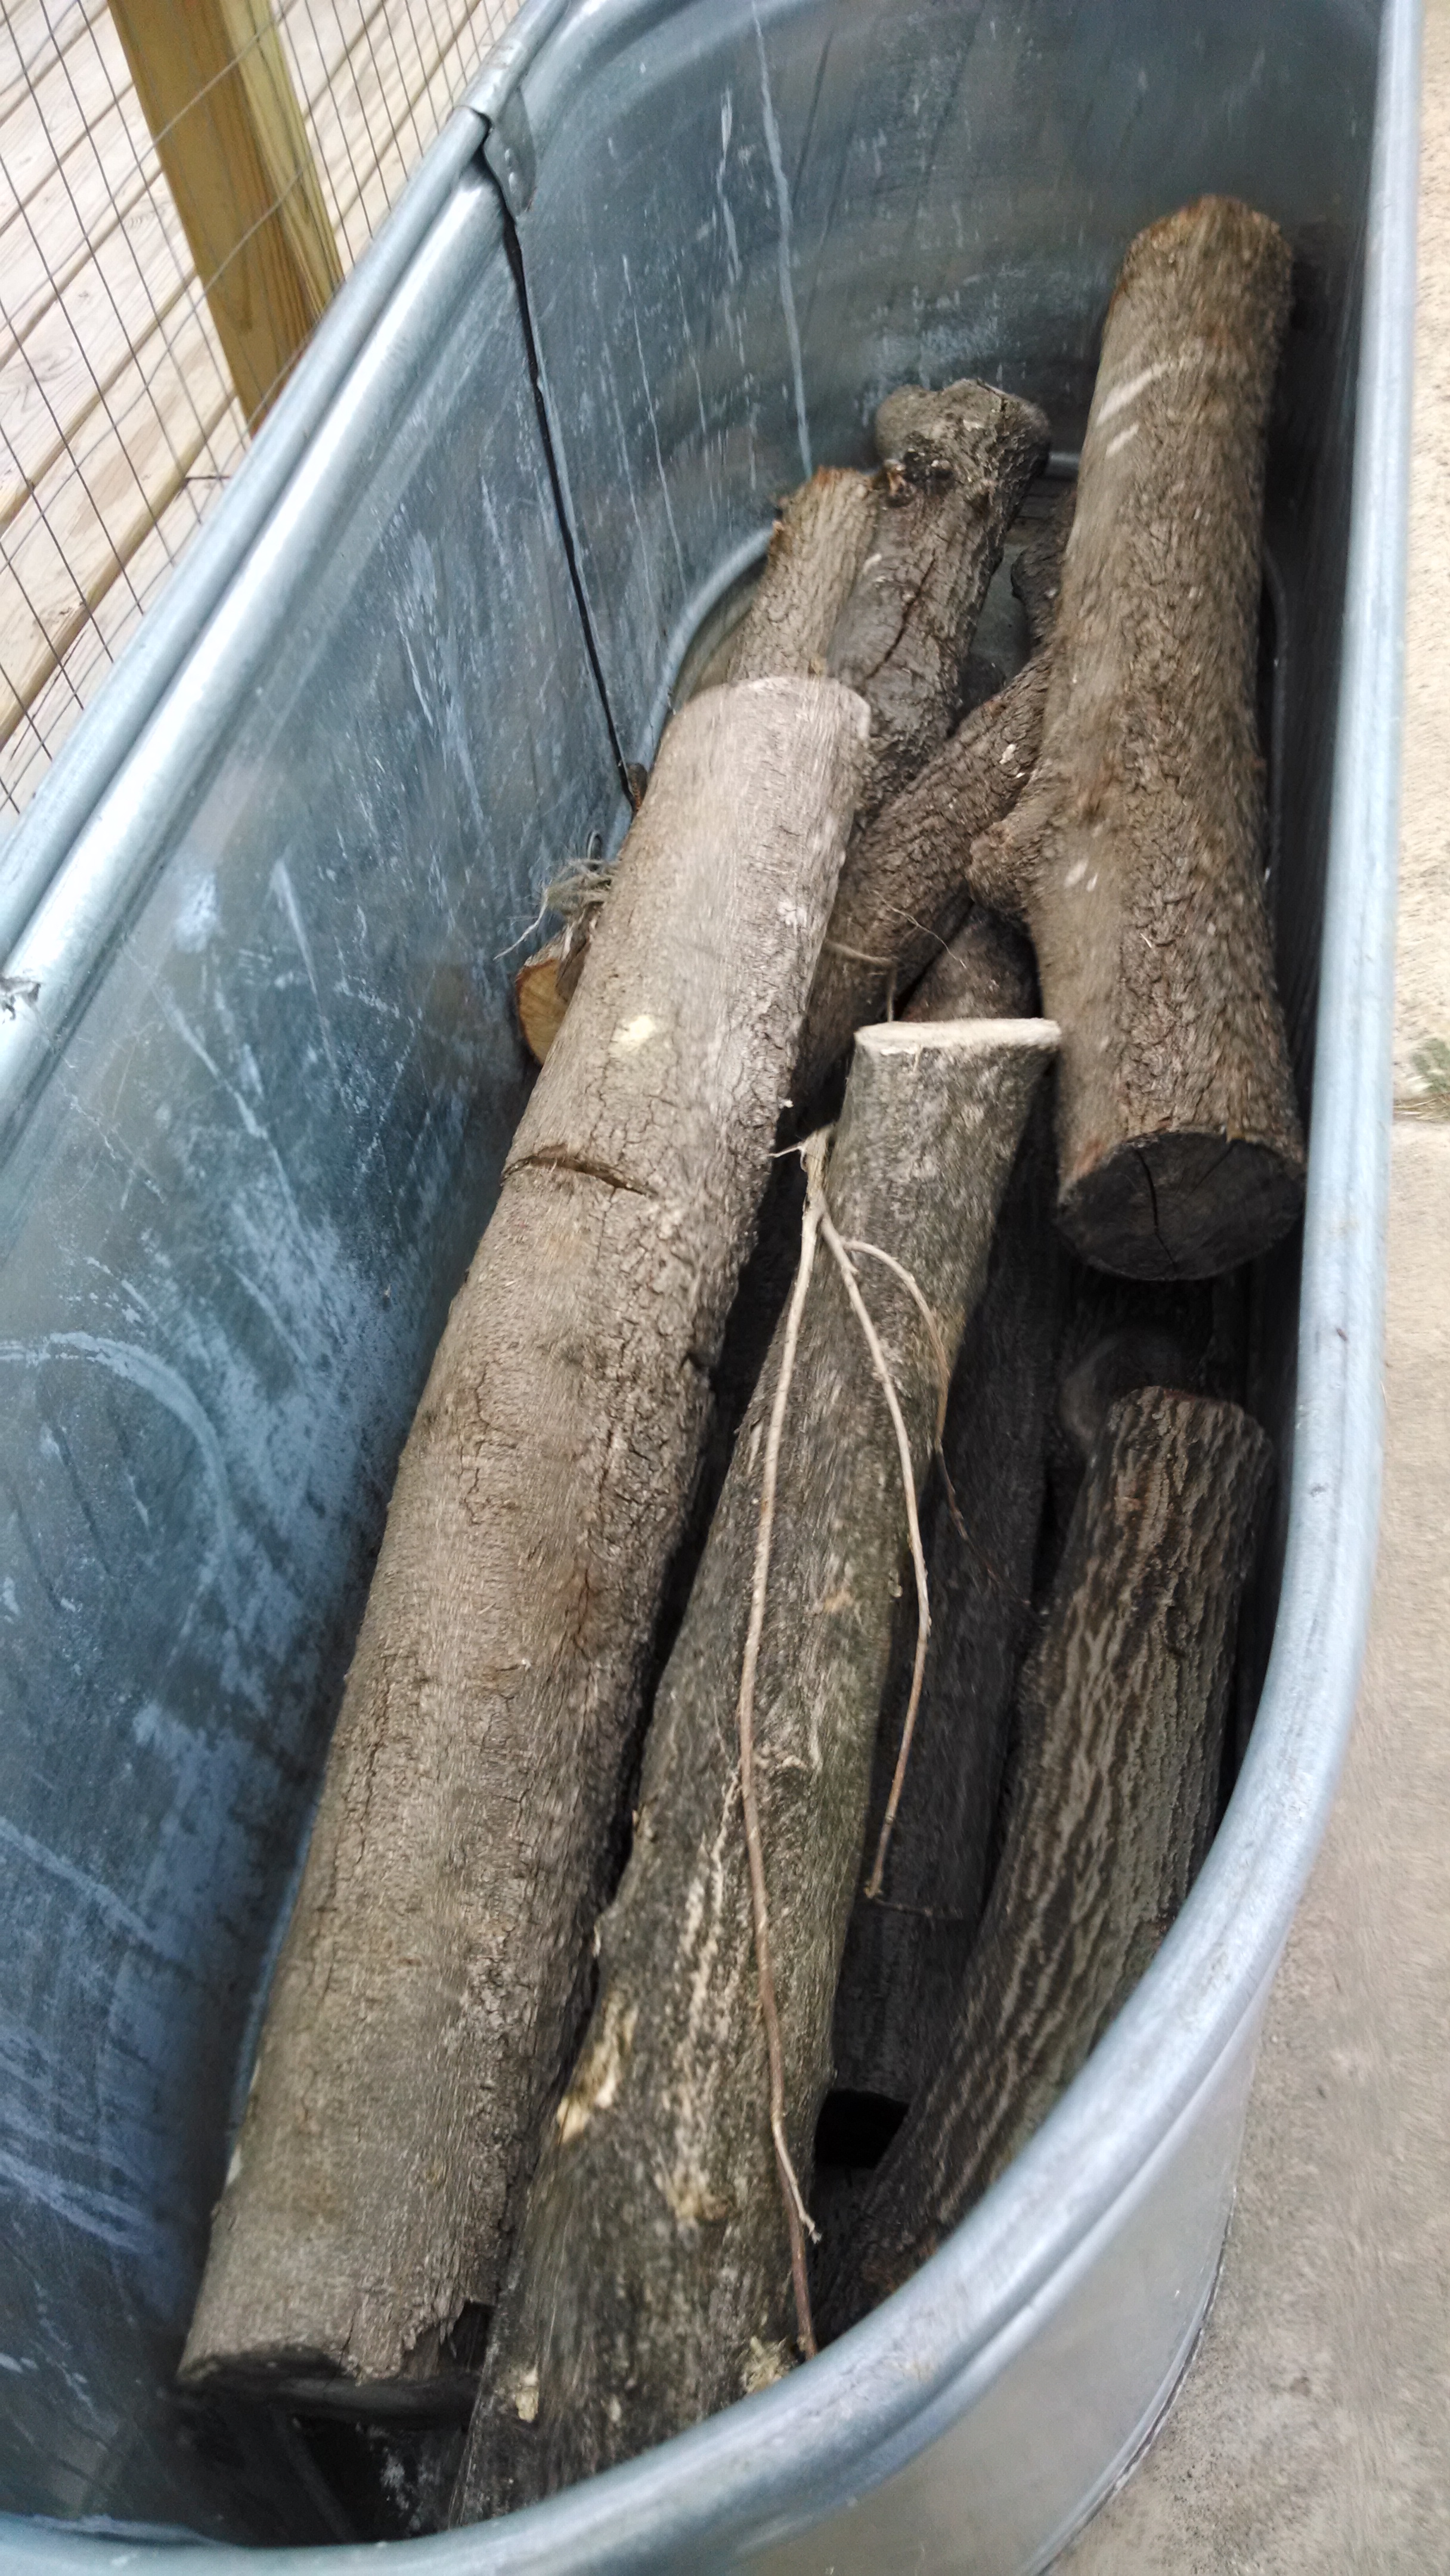
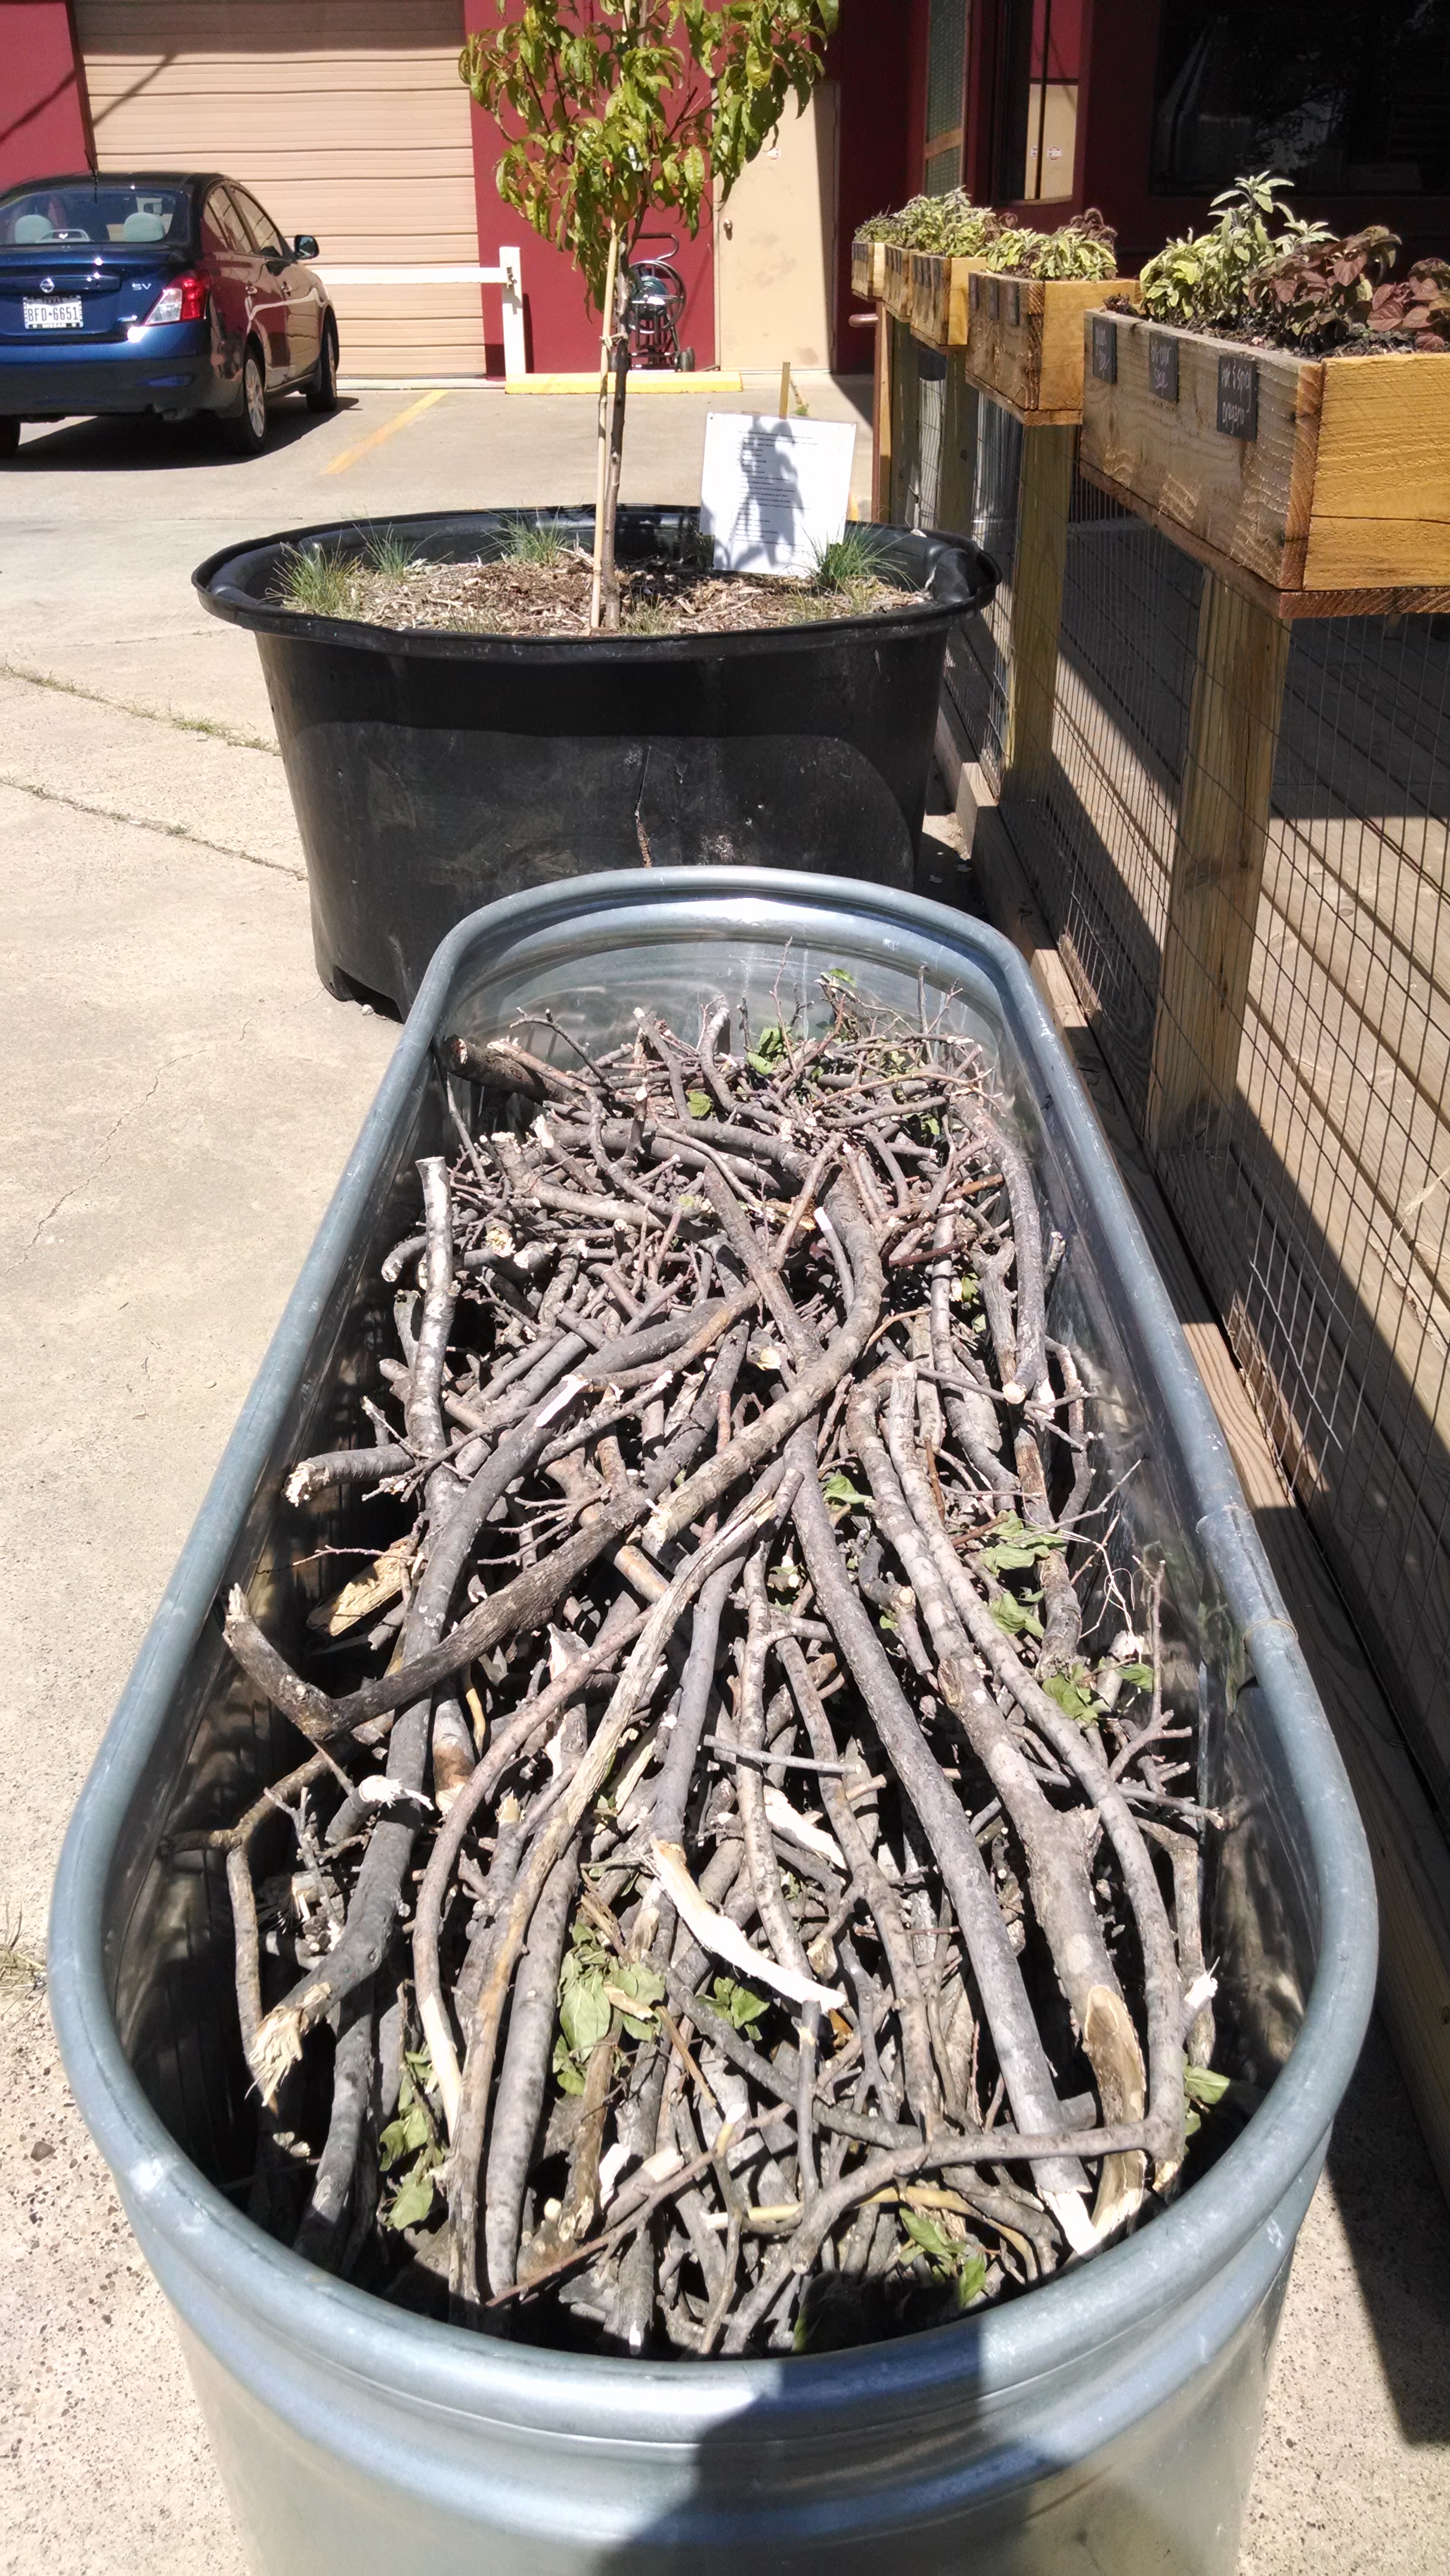
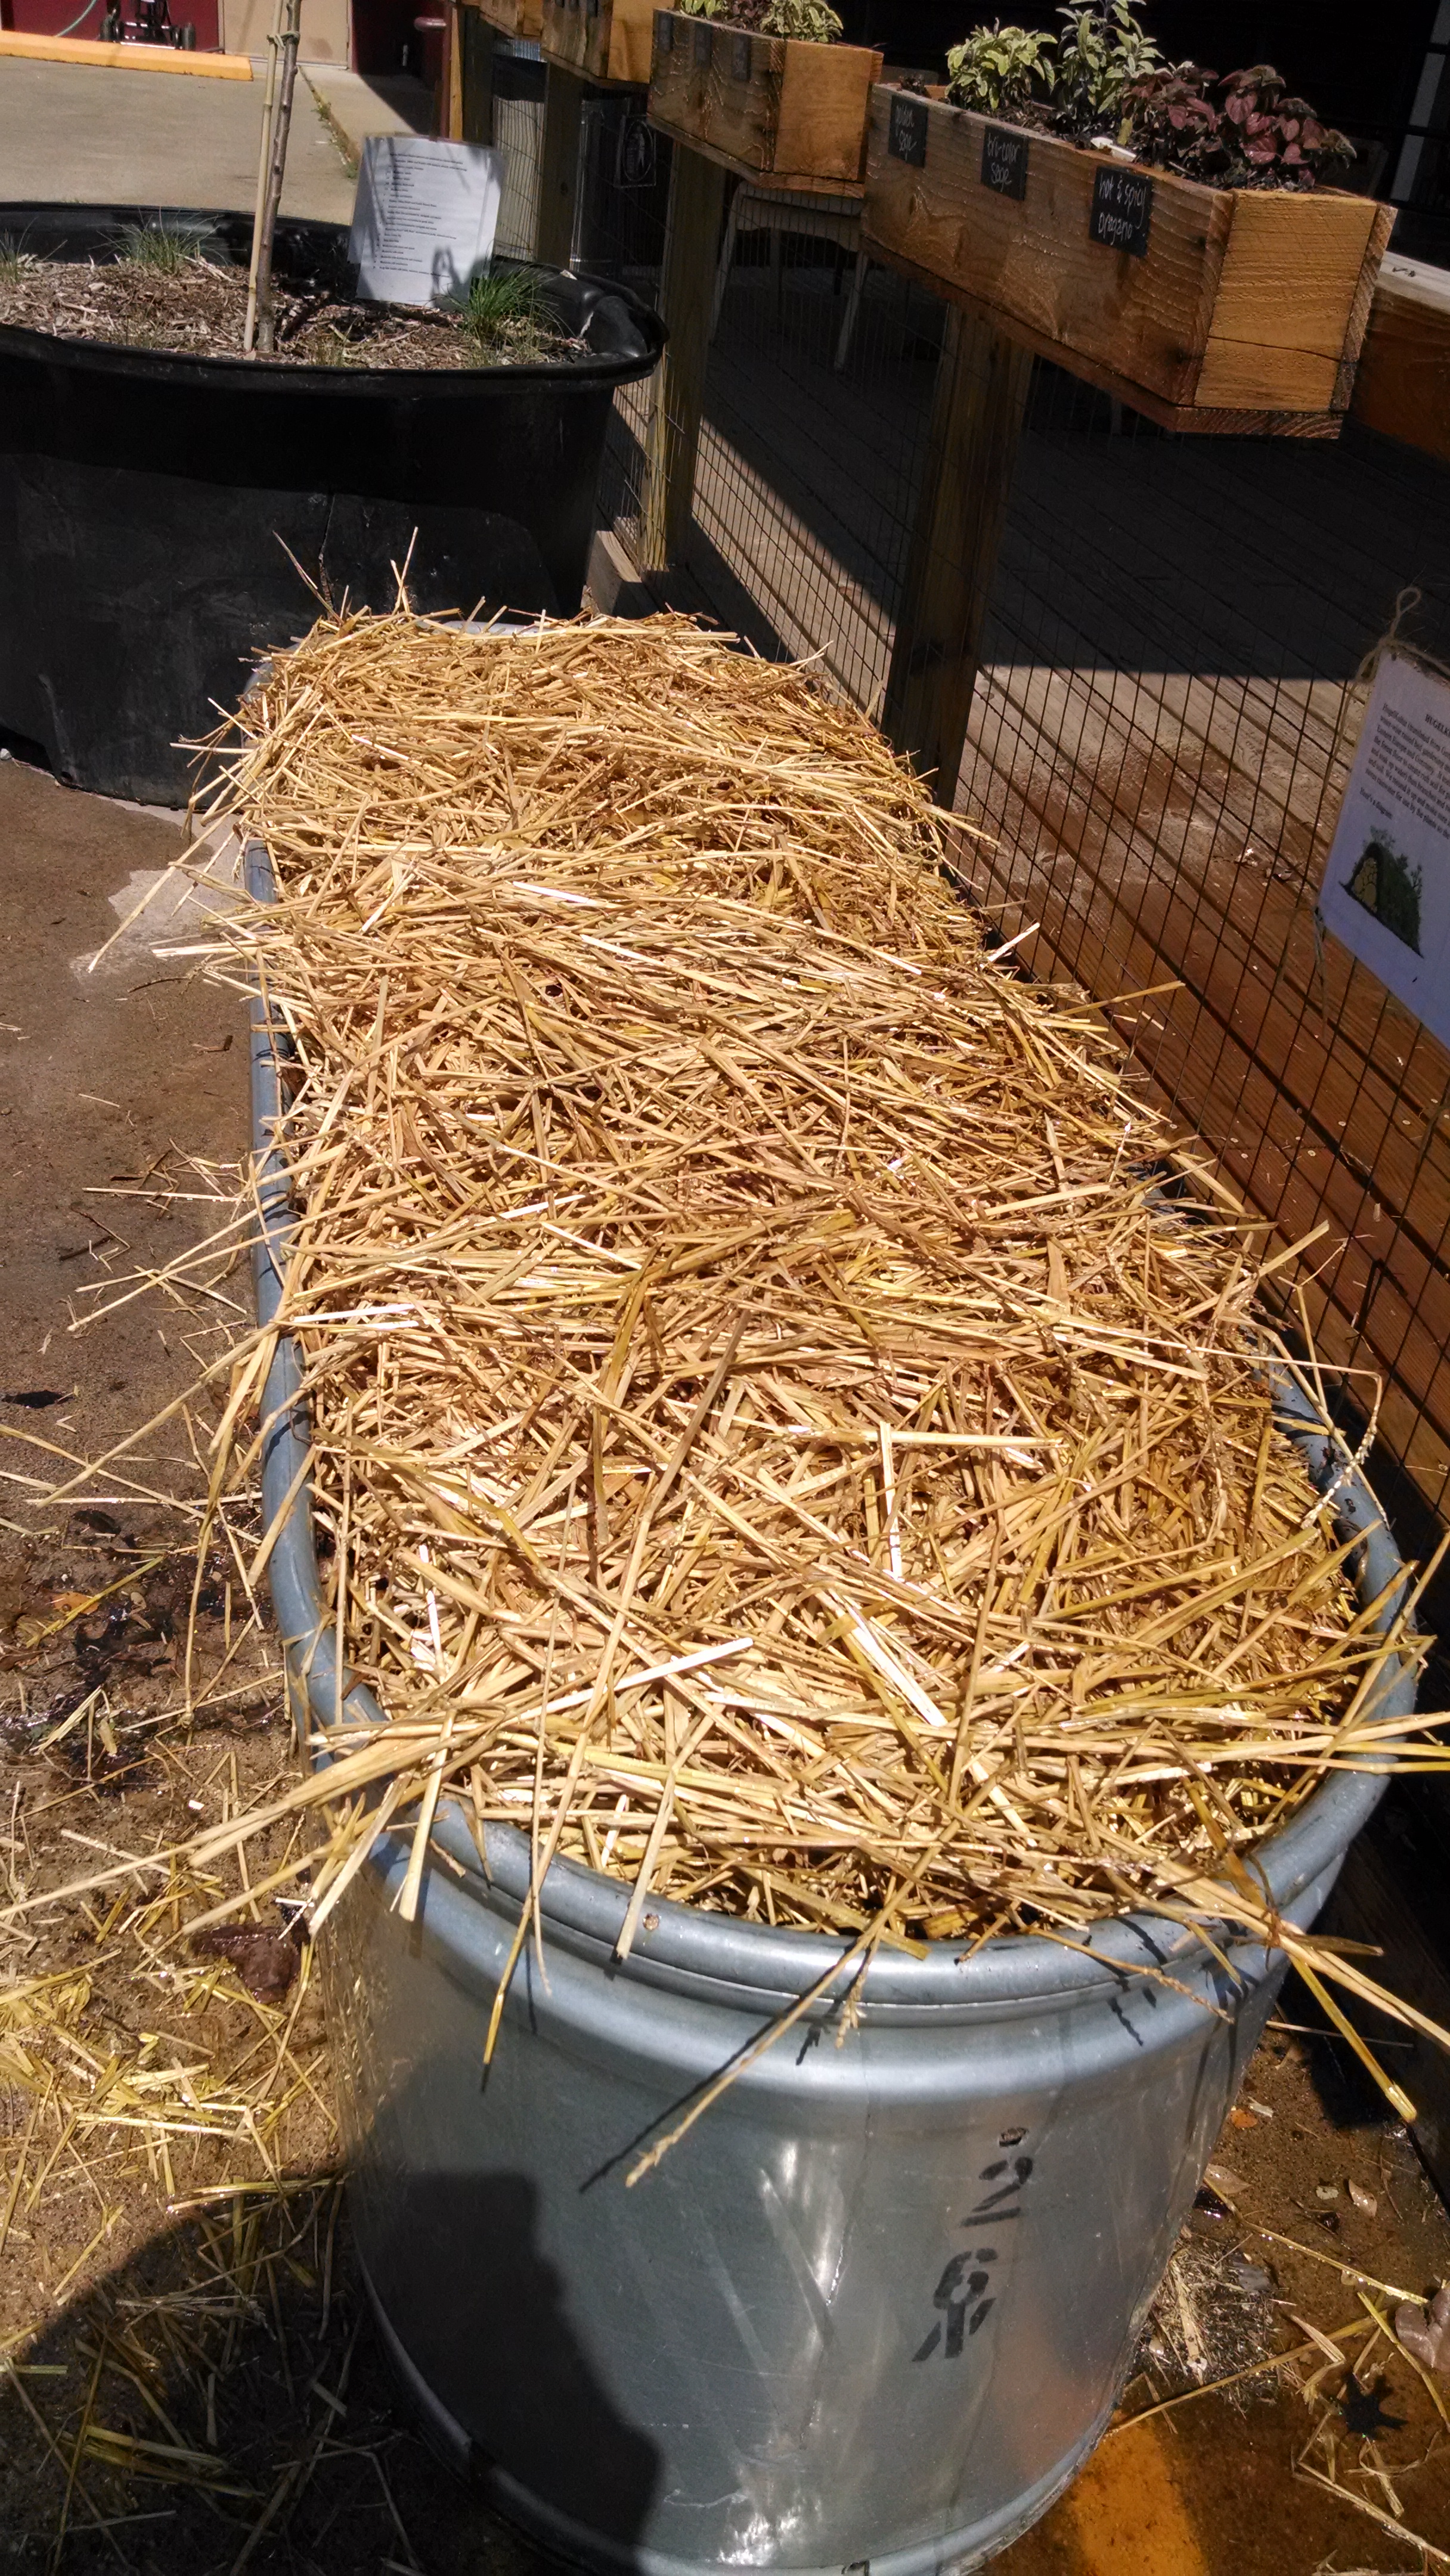
The bed doesn’t have to be in-ground either.  Hugelkultur can be built on the ground, or in a container.

Hugel container straw

One garden I built was in a horse trough – I drilled ½” drainage holes about 8” apart on the sides of the trough. Then filled with logs, sticks, and straw, and covered with a layer of compost and planted herbs.

Hugel planted

I read online about a lady who takes muck tubs (they are the large plastic tubs with plastic rope handles often seen in barns for hauling…muck…), puts holes in the bottom and puts a short log upright in the tub.  She then drills holes in the upper end of the log (to encourage water to go into the log), fills with leaves and compost and tops with soil.  Then she plants.  She says at the end of the season, after having reduced the water needs in her muck tub containers, her plants have grown their roots around the log.  I’m going to have to try this I think this winter!

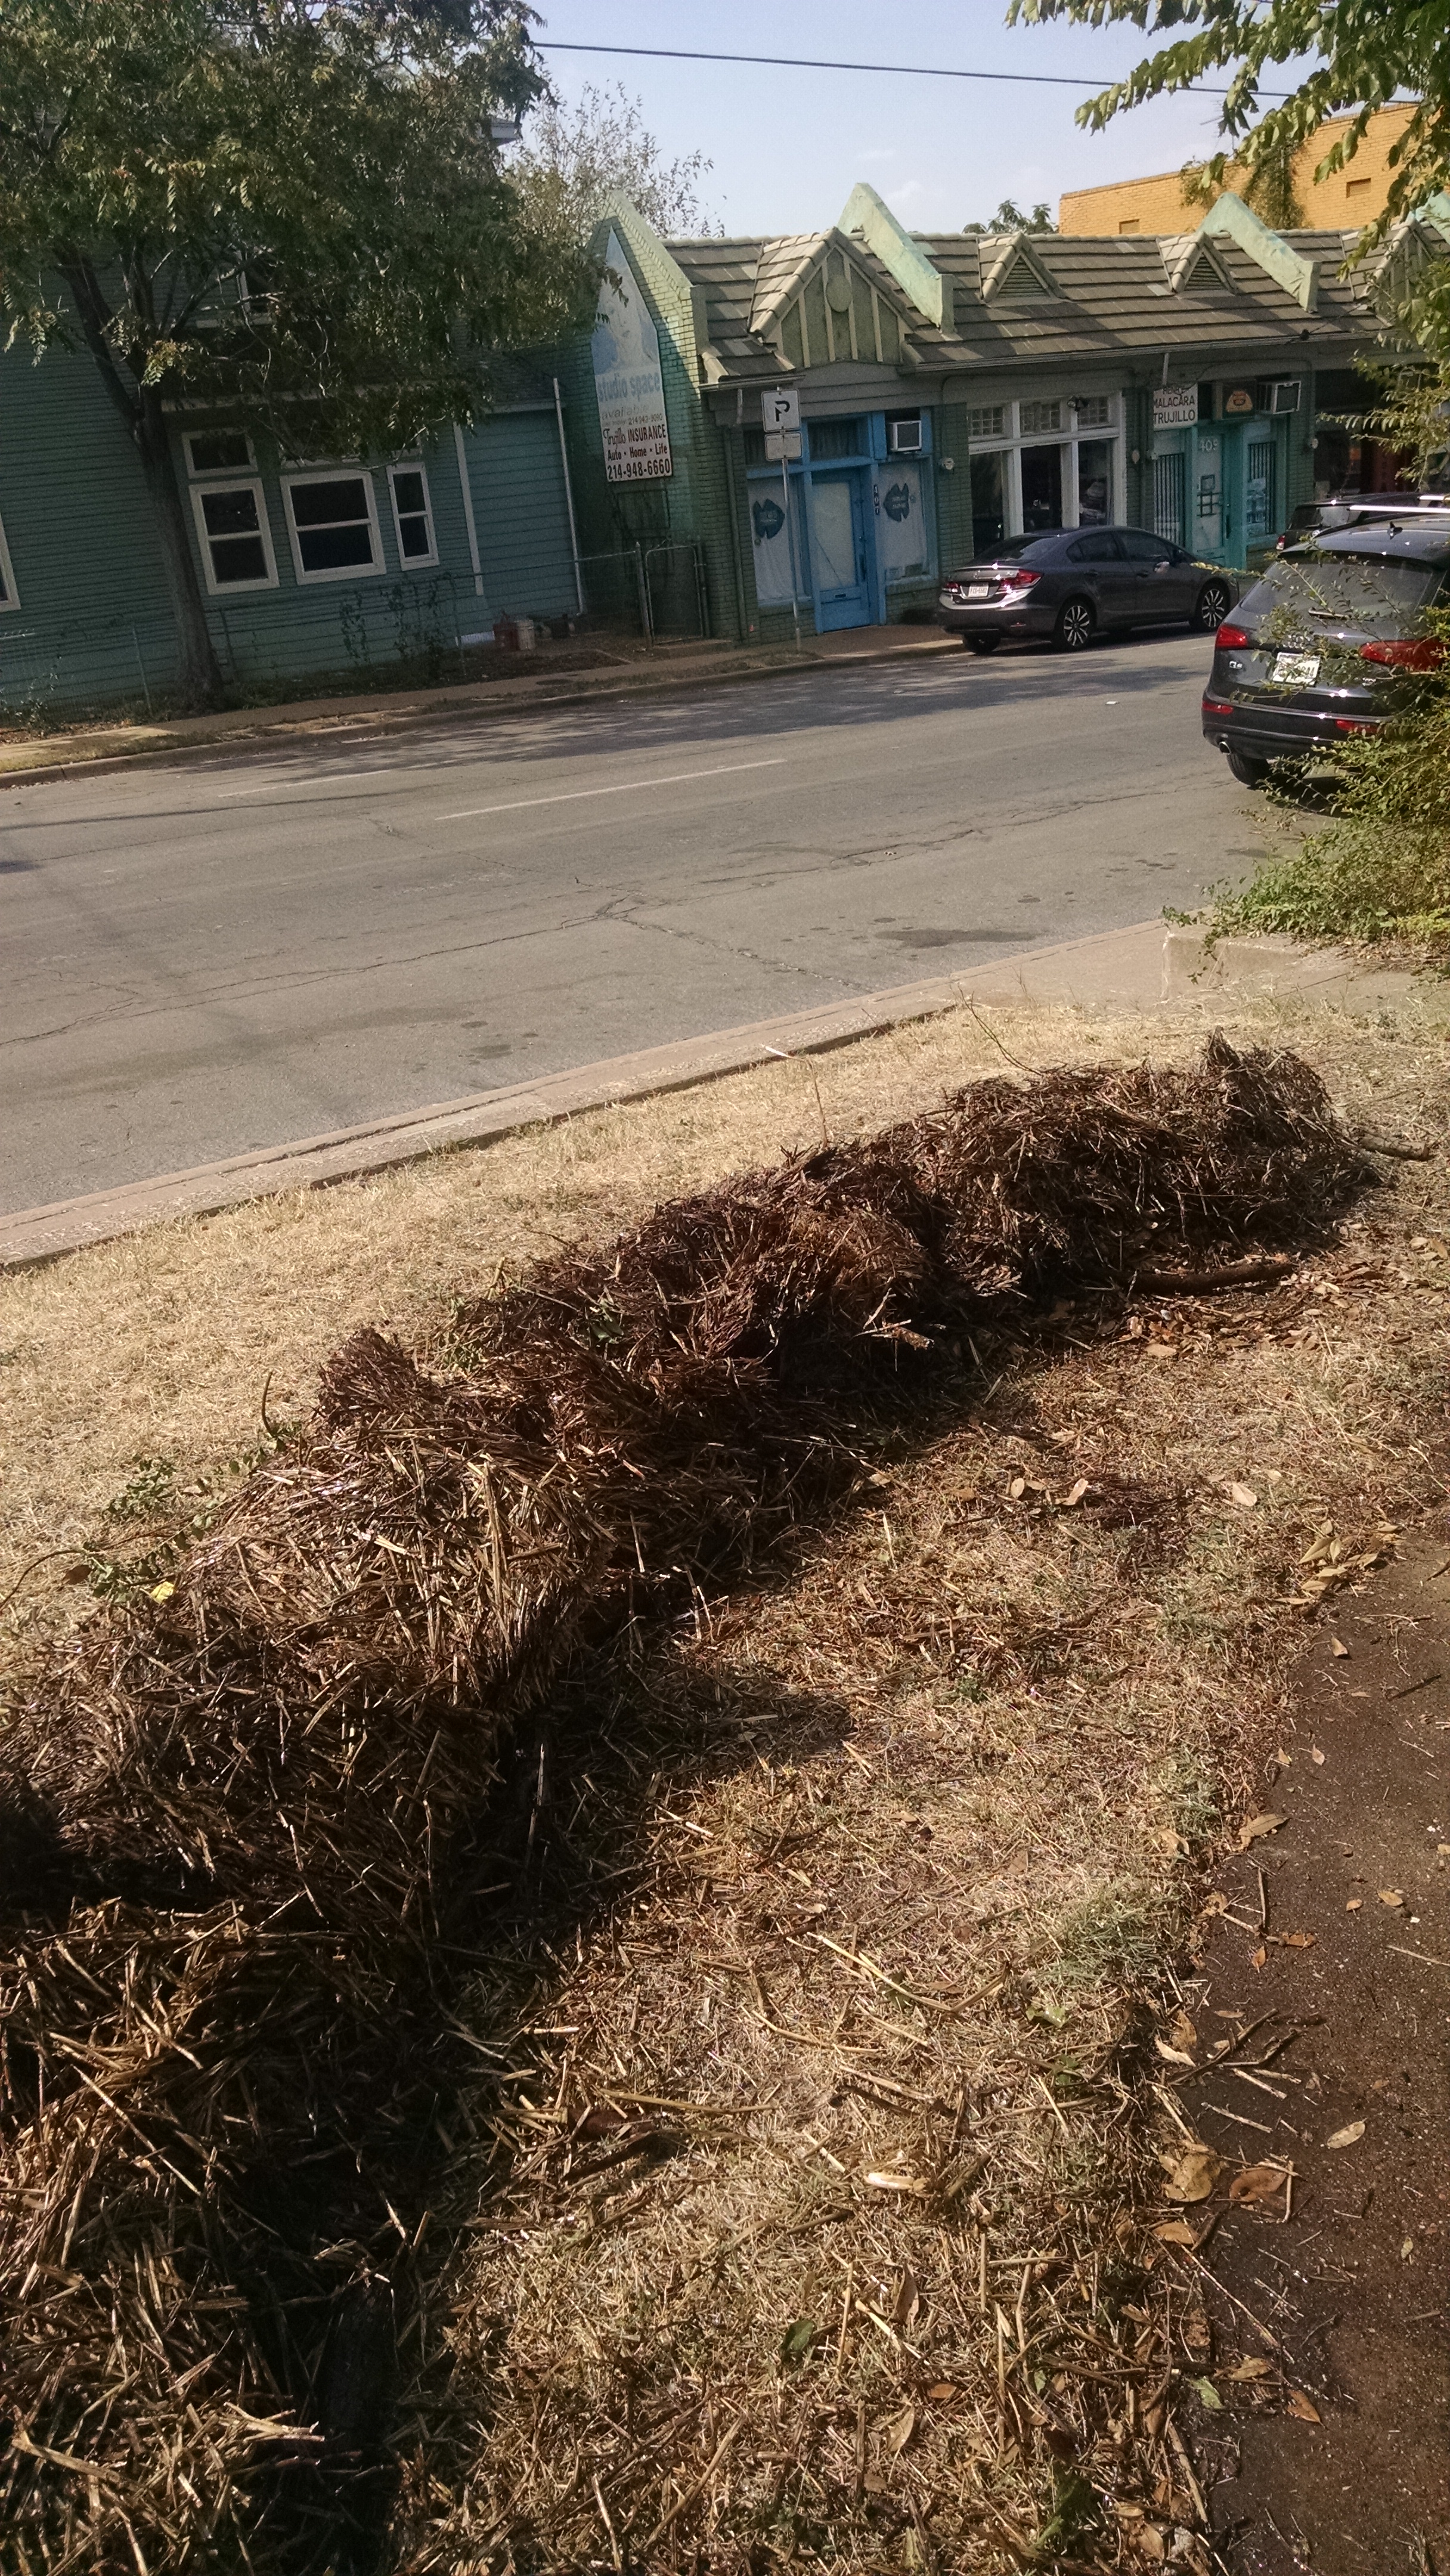
We adapted hugelkultur last month, when we built a formal keyhole garden. The home owner had trimmed crape myrtles and was about to put them out on the street for pick up.  We put those trimmings in the bottom of the keyhole garden, along with leaves, cardboard, dryer lint, straw, compost and then top soil and mulch. The garden will be a compost pile with hugelkultur overtones…a mixing of two incredible water-holding, nutrient-rich planting environments.

One caveat – the garden bed will decrease in height over time, so just keep adding mulch and compost on top. And you’ll have the richest, softest, best water-holding beds imaginable.

Be creative.  Use the concept and let me know how you have used this technique that mimicks the forest floor.

Gardening During Drought – Part I

As I was driving through Plano the other day, I was thinking of California, which is in the news with state mandated water restrictions.  There are signs on most well-travelled roads that watering restrictions are in force.  Water conservation is good any time, but with a continuing drought, we have to re-think how we garden and how we water.

There are a number of ways to reduce watering when installing/replanting a garden.  First, the more organic matter that is in the soil, the more it will hold the water it gets.

Sometimes folks use things to break up the soil and aerate it, but don’t realize that it isn’t helpful for holding water.  Peat moss has been the favored clay loosener, but I was reading the other day that peat pots tend to cause soil to dry out faster – leading to more frequent watering.  Does that mean that it also doesn’t hold water as well when mixed in the soil?  A better amendment for potting is sustainably harvested coco fiber – it also holds water quite nicely.

What’s that?!

Coco fiber is that fiber on the outside of a coconut.  It comes in bricks and I’ve seen them available at local garden nurseries such as Redenta’s as well as North Haven Gardens.  The bricks are made of fibers that are dehydrated and compressed. The fun part is when you put that brick in a LARGE container to rehydrate (not the regulation 5-gallon bucket, which I heard one person busted during the rehydration process, because it wasn’t large enough).  Put water in the water in the container with the brick and watch what happens – it’s great for kids to participate in this process.  If you want to get mucky, start massaging the fiber off the brick into the water – you get a slurry of muddy mass.  THIS is what you use to mix into potting soil or into raised beds to loosen clay, aerate the bed, and provide moisture retention.

Because the coco fiber does hold moisture – you just witnessed this quality when you rehydrated it!

So we need organic matter – that also means compost and lots of it!  If you haven’t started your compost pile, now (whenever now is) is the best time.  Never too late.  I’ll write another week on compost piles – the slow, the soon and the real quick methods. You can also buy compost (bagged or by the pickup load or by the dump truck load) from folks like Soil Building Systems.

Organic matter – lots of it.  That’s number one.

Then there’s mulch.  Lots of it, too.  Mulch can be bagged stuff you get from the nursery, or delivered by the dump truck, or gathered yourself on the side of the street (read:  leaves in bags). You can also buy straw (not hay) to use as mulch.  Newspapers work, as does cardboard, spread around your plants and watered in well and then covered with leaves (watered in well also).

Leaves make excellent mulch.  Think of a forest floor and how the leaves carpet the ground, keeping it moist and soft, then deteriorating and becoming part of the soil.  Leaves are also free.

I should note here that if you get a dump truck load of mulch, you might want to invite some friends over to help you distribute it.  Here’s a picture of a mulch-spreading party this last weekend.

Mulch mountain

Mulch is magic.  It serves many purposes – first, it keeps weeds down (yay! less work!).  Second, it shades the soil so that the plants’ feet stay cool even in the hottest baking sun.  That means less water, because it prevents the soil from drying out.  And third, mulch condenses moisture from the air during the night, bringing more moisture to the soil and your plants.    (NOTE:  Do not use cedar bark mulch on vegetables – it’s best used in ornamental plantings.)

All that compost and mulch results in less watering needed to keep your garden going and producing.

In doing some calculations for a community garden’s rain water collection needs, I read that 100 sq. ft. of conventional vegetable garden needs 60 gal. a week at 60 degrees Fahrenheit.  Obviously as the temperature goes up, more water would be needed.  I couldn’t find any figures for how much mulch and organic matter reduce that, but I’ll bet it’s quite a bit – maybe as much as 50%.  Be kind to your water bill – and conserve.

In Part 2 (next week) I’ll talk about how we can build garden beds that require even less water.

Hornworms and Companion Planting in the Garden

In a gardening class this weekend, the discussion turned to growing tomatoes and the prevalence of the tomato hornworm.  Truth be told, I have not, in the last two decades seen a hornworm on my tomatoes.  Maybe I just don’t see them, but I sure don’t see any leaves eaten either.

Hornworm

Whitney Cranshaw, Colorado State University, Bugwood.org


Here’s what I do to avoid them (and other pests).

Borage, a lovely purple flowered herb, can be grown with the tomato plants and keeps hornworms away.  I also plant marigolds in the vicinity (to ward off root knot nematodes that can devastate tomatoes), and basil.  Not only do the tomatoes have company, but I get lovely flowers, cucumber-tasting borage leaves for salads, and fragrant basil.

I also don’t plant tomatoes in the same garden space two years in a row.   In fact, I’m on a 3-4 year rotation.

The practice of companion planting can produce more food for the space than just planting recommended spacing of mono-crops.

I’m a big fan of companion planting over and above any pest control benefits. Companion plants are those that help each other, and sometimes even increase yields for each other.  Friends helping friends.

A good companion planting with strawberries is spinach.  They both like more acidic soil.

Carrots go well, when planted among tomatoes late in the summer/early in the fall, when the tomatoes shade them from the hot sun, yet let them get a start.  The carrots use the under-surface growing horizon and are ready to burst forth when the tomatoes are done for the season.  Two crops from the same space.

Potatoes and beans (particularly bush beans) go well together.  They protect each other from Colorado potato beetle and Mexican bean beetle.

Okra and peppers do well together, especially if the okra is used as a windbreak for the peppers.

And if you’re growing lettuce and have problems with rabbits helping themselves, I’m told that onions planted with the lettuce will repel the rabbits.

[NOTE: A good read for companion planting is Carrots Love Tomatoes.  Look for the full citation under the Resources tab on this website.]

And while I’m on the subject….how about planting lots of rosemary?  It helps repel mosquitoes!  I advocate rosemary plantings around the deck or patio.

Other repellents or remedies include pepper flakes and orange peels.

To repel pests eating plants (e.g., basil, sage, peppers), boil red pepper flakes in water. Strain into a spray bottle and add about 1-2 tsp of dish soap (preferably 7th Generation or Ivory Soap). Shake and spray on the plant leaves.

For fire ants, boil orange peels in water with some whole cloves.  Strain into a jar and add the same amount of water.  Pour on the mound. May have to repeat after about a week. It makes the ants go away.


Garden Uses Simple Method of Rainwater Capture; Chard Loves the Snow!

DK rain capture


One of the challenges of small community gardens can be the cost of bringing water to the property.  If the garden is on a vacant lot, then there is no large building from which to gather rainwater. What to do?

But there is a solution, and one garden in Dallas, the Divinekinship Community Garden, is serving as the model.

They have constructed a roof on poles – I call it a rainwater capture shelter.  More specifically, it is a roofed, open sided structure approximately 8-9 ft. square, supported with 8’ landscape timbers at the corners (buried about 18” into the ground for stability), with a plastic/fiberglass corrugated roof.  The roof is approximately 6 ½ feet high at one end of the structure, and approximately 6 feet high at the other end, so there is a slight slope down to a gutter, which feeds via a flex-spout into an IBC tote.  The IBC tote is connected to a second IBC tote for overflow.

An estimate of the rainfall harvesting capacity is:      9’ x 9’ = 81 sq. ft. of roof.  x .6 gallons/sq ft/inch of rain = 486 gallons captured in 1” rainfall.

The total cost, exclusive of IBC totes, is approximately $100-$110, if materials are new.

Here are some pictures of the setup.  If materials can be scrounged someplace, the cost goes down.

DK rain gutterDK rain roof

The drought conditions in the Dallas/Fort Worth area continue.  And some communities may be facing more severe water restrictions this summer. A check with the National Weather Service revealed that we received 21.32 inches of rain in 2014. In 2013, the annual rainfall was 29.4 inches; in 2012, it was 31.26 inches.  Even if there is another water source for the garden, capturing rainfall has the potential to cut the water bill substantially.

And there’s another way to reduce water usage:  Mulch. Heavy use of mulch as well as working lots of organic matter into the beds will help reduce the water needs of the growing beds.

 Chard after snow


My chard came through the recent freezes and snow with flying colors.  Almost as if it energized the plant.  Love chard.